- Accessories
- Cleaners & Waxes
- Clothing & Gifts
- Cooling Systems
- Electrical Systems
- Engine Parts
- Exhaust Systems
- Fuel Systems
- Gauges & Accessories
- Hose & Fittings
- Jet Drives & Accessories
- LS Engine Parts & Accessories
- Oil Systems
- Oil, Lubricants & Paints
- Outdrives & Accessories
- Propeller Accessories
- Safety Equipment
- Sale Specials
- Steering Systems
- Steering Wheels & Adapters
- Superchargers
- Throttles, Shifters & Controls
- Trim Indicators & Accessories
- V-Drive Components
- Discount Dock
- New Products
- OEM Replacement Parts
- Package Deals
- Diversified Marine Catalog
- GLM Marine Catalog
- Mallory Marine Catalog
- Mercury Marine Catalog
- SEI Marine Catalog
- U-FLEX Marine Catalog
- Your Account
- Shipping Information
- Return Policy
- Return Request Form
- Privacy Policy
- Security Policy
- Berkeley Jet Rebuild Videos
- Customer Image Gallery
- Careers at CP Performance
- Coupon Codes, Promos, Offers and Specials
- Dealer Information
- Installation Instructions
- Link Exchange
- Livorsi Dash Designer
- Mercruiser Parts Finder
- Press Release Archive
- Technical and Product Advice Blog

Browse Categories
Need Help? Call Us:
1-800-225-9871
Outside the USA? Call 707-585-9871
- LS Engine Parts and Accessories
- Outdrives and Accessories
- Tools & Accessories
- Trim Indicators and Accessories

- Mallory / Sierra Marine Catalog
- Mayfair Marine
- SEI Marine Products Catalog
- AEM Performance Electronics
- American Turbine
- ARP Fasteners
- Barnegat Light
- Berkeley Jet Drive
- Bluewater Enterprises
- Cometic Gaskets
- Competition Headers
- Corsa Performance
- Custom Marine (CMI)
- Delfino Steering Wheels
- Get Real Products
- Glenwood Marine
- Grant Steering Wheels
- Gussi Steering Wheels
- Hardin Marine
- Hi-Tek Marine
- Holley Marine
- IMCO Marine
- Isotta Steering Wheels
- K&N Engineering
- Lightning Headers
- Livorsi Marine
- Mallory / Sierra
- Marine Design Corp
- Marine Lighting Products
- Max Volt Ignition
- MSD Ignition
- Oliver Racing
- Orca Marine Cooling Systems
- Place Diverter
- Plash Marine Lighting
- Rewarder Custom Headers
- San Juan Engineering
- SEI Marine Products
- Stainless Marine
- The Blower Shop
- XRP Fittings
- Zeiger Steering
We will be closed in observation of Independence Day on Thursday, July 4th and Friday July 5th. We will reopen Monday, July 8th. FREE GROUND SHIPPING available on these SELECT ITEMS thru Sunday July 7th. Use promo code ID4FREESHIP at checkout!
- Oil, Lubricants & Paint
Special Sections
Hot deals from cp performance.
Special Sections of CP Performance
Welcome to CP Performance
CP Performance is the world's leading marine mail order superstore for all your performance boating needs! We carry the finest selection of Performance Marine Parts, as well as a large library of technical information to help you get your boat working in the finest order! Check out our hot deals, or just browse through the categories. Whether you're looking for Marine Exhaust Systems, Gauges, or more, we're sure you'll find what you're looking for, here at CP Performance.com. If you're having trouble, or can't fnd what you're looking for, don't hesitate to contact us with any questions or comments!
Shopping Cart: 0 Items
Most orders placed by 1 pm ship today!

Your #1 Source for Lower Units

Shop Current Mercury/Mercruiser Parts Now
Shop obsolete mercury/mercruiser parts now .

Shop Evinrude/Johnson/OMC Current Parts Now
Shop evinrude/johnson/omc nla obsolete parts now.

Shop Current Volvo-Penta Boat Parts Now
Shop volvo-penta obsolete, nla, hard to find boat parts now, oem parts & lower units - quality you can trust, the most reliable rebuilder in the us, lower units, over 2 million oem parts ready to ship today, boat parts & accessories, new and used oem parts available, hard to find parts, welcome to us boatworks.

Welcome to US Boatworks , where keeping you on the water is our #1 priority. We specialize in lower unit replacement. If your looking for rebuilt or remanufactured lower units, you’ve come to the right place! Our seasoned team members are experts in gearcase building and we take pride in getting you back on the water quickly and affordably.
In all of Kansas City , there isn’t a friendlier or more knowledgeable staff than ours. We’re happy to help you with boat parts or boat repair you need. Check out our catalogs to find Mercury, Mercruiser, Mariner, Force, Evinrude, Johnson, OMC and Volvo parts. If you need help in making your selection, call or stop in —we’re always ready to help!
We are family-owned and operated and conveniently located in Kansas City , KS . US Boatworks provides you with the latest and best boat parts and Mercury Motors to make your time on the lake more enjoyable. By having one of the largest boat part inventories in the US, we can help get you back on the water quickly. We do this by avoiding having to wait for parts to ship from the manufacturer. Choose US Boatworks & find comfort knowing you will have a great day on the lake.
We know individuality is important, which is why we pay close attention to the interests of each customer. From the minute you walk through the door, meeting your needs is our top priority. Founded not only on excellent customer service, but also on the principles of hard work and a focused attitude, US Boatworks has a long list of satisfied customers. Call or stop by; you’ll be glad you did.
Why Choose US Boatworks
Visit our online parts store to buy high-quality OEM boat parts at prices up to 25% below retail.
FREE SHIPPING
Online orders of $100 or more ship for free when you select USPS. Exclusions apply.
FAST SHIPING
Most orders placed by 1 pm cst ship the same day! Call us for Next Day Air Shipping.
Over 40 years Replacement Drive business. We know your motor inside and out.
Latest Blogs

Can I Use Automotive Parts in my Boat Engine?
The Dangers of Using Automotive Parts in Boats Using automotive parts in a boat engine is risky and that can lead to serious consequences. While it might seem like a cost-saving idea, the potential dangers far outweigh any financial benefits.
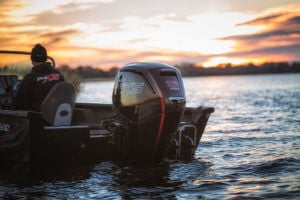
Mercury Rebates on 115-150 hp FourStroke
115-150hp Pro XS Engines aren’t given the Pro XS badge – they have to earn it. Designed with input from professional anglers, the 115hp and 150hp Pro XS deliver best-in-class performance for boaters who demand the highest speeds and quickest hole shots.
Mercury’s 5 Year Warranty
Where to find your boat engine serial number, boating safety, introducing the volvo-penta dps-b upper, open saturdays 9 – noon, how to operate an outboard motor in freezing temperatures, real google reviews.
Ready To Get Boat Parts? Call Us Now
Are you looking to buy the best boat parts? Contact us for a free quote to get the part you need at a great price.

We take boating seriously so you can have fun. We do this by providing quality service, experience and strength. We offer the best boat repair service department in the Kansas City area,
- 930 Osage Kansas City, KS 66105
- [email protected]
- (913) 342-0011
- Monday - Friday: 9 AM to 5 PM CST
- Saturday: OPEN thru Oct 9-Noon
- Sunday: CLOSED
© 2023 US. Boatworks, Inc. |All Rights Reserved|
- Privacy Policy
- Shipping Terms
WIN A FREE MERCURY T-SHIRT

Join us to receive great boat maintenance tips and coupons & be entered in a raffle to receive a free T-Shirt

- Engine_Fuel & Props
Engine Parts

Parts Selection Guide
Find the parts you need
- 1) Engine Manufacturer: --
- 2) Part Type: --
- 3) Select Model: --
Prop Selection Guide
Find the right prop for your boat
- Engine Manufacturer: -- Evinrude Force Honda Johnson Mariner Mercruiser Stern Drive Mercury OMC Stern Drive Parsun Suzuki Tohatsu/Nissan Volvo Penta Yamaha Yanmar Stern Drive
- Engine Horsepower: --
- Engine Model: --
- Engine Year: --
- Prop Pitch: --

Mercury Outboard Parts
Mercruiser Parts

Evinrude Outboard Parts

Yamaha Outboard Parts

Johnson Outboard Parts

OMC Cobra Sterndrive Parts

Volvo Penta Sterndrive Parts

Chris-Craft Inboard Parts

Chrysler Inboard Parts

Chrysler Outboard Parts

Crusader Inboard Parts


Force Outboard Parts

Honda Outboard Parts

Indmar Inboard Parts

Nissan Outboard Parts

PleasureCraft Inboard Parts

Suzuki Outboard Parts

Tohatsu Outboard Parts

Fuel Hose USCG Type A
MPI Fuel Hose USCG Type A This premium quality fire-retardant fuel hose meets or exceeds all requirements of new ISO 7840 and SAE J5127 standards required by USCG, ABYC and NMMA. Inner tube material provides extraordinary resistance to gasoline,...

Quicksilver High Performance Gear Lube
Quicksilver High Performance Gear Lube SAE 90 Quicksilver High Performance Gear Lube is a synthetic blend gear oil that’s specifically designed and tested for marine applications. SAE 90 Gear Lube is manufactured to provide maximum protection for...

MPI Marine Products 350-1120 Fuel Fill Hose 1 1/2"
MPI Marine Products 350-1120 Fuel Fill Hose 1 1/2" Since 2012, marine fuel filler hoses must meet stricter standards than before. If you are replacing your recreational craft’s fuel fill hose it is essential to have a fill hose that resists the...

TFXtreme 3300/33C Type Universal Control Cable
Teleflex Xtreme 3300/33C Type Universal Control Cable Teleflex’s 3300 Universal Control Cables are high-quality, universal-type cables that are designed to fit aftermarket engine controls as well as OEM units from BMW, Chrysler, Honda, Nissan,...
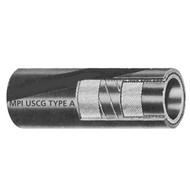
Marine MPI-350-0580 Products Fuel Vent Hose 5/8"
Marine MPI-350-0580 Products Fuel Vent Hose 5/8" - Sold by the Foot Fuel Vent Lines - Gasoline up to 85% ethanol blended fuel, diesel fuel Meets USCG Type A1 Requirements For Pleasure Boats Resists gasoline/alcohol blended fuel Fire...

Quicksilver 25W-40 4-Stroke Conventional Marine Oil
Quicksilver 25W-40 4-Stroke Conventional Inboard & Sterndrive Marine Oil This superior 24w-40 marine engine oil has been specifically formulated and developed to meet the needs of high-output sterndrive and inboard engines...

Sierra 18-7945 Fuel Water Separator Filter
Sierra 18-7945 10 Micron Long Fuel Water Separator Filter Sierra fuel water separators remove over 99.8% of emulsified water from your gasoline. Sierra's 10 micron filters are over 90% efficient at removing particles as small as 10 micron without...

Mercury - Mercruiser 54-816311T 8" Fuel Line Cable Tie 0
Mercury - Mercruiser 54-816311T 8" Fuel Line Cable Tie 0 8 in. (203 mm) long, black color, 3/8 in. to 1 3/4in. (9.5-44 mm) bundle diameter, 60 lbs. (27 KG) minimum loop tensile strength. Priced individually, sold @ multiples of 100. Genuine OEM...

Sierra 3/8" Low Permeation Fuel line 16-368-0380
Sierra 3/8" Low Permeation Fuel line 16-368-0380 The Sierra 116-368-0560 is a 3/8" fuel line that features a plastic barrier veneer with an NBR outer layer tube to prevent permeation. This fuel line meets USCG type A1-15 requirements for pleasure boats...

Champion QL78YC Spark Plugs
Champion QL78YC Marine Spark Plug Champion marine spark plugs are quality OEM replacements. The Champion QL78YC Spark Plug features a copper core electrode that provides increased conductivity and heat control for good overall wear. These marine spark...

NGK BPR6EFS Spark Plug
NGK BPR6EFS Spark Plug This standard spark plug features a copper core to promote heat dissipation and more efficient spark plug operation; has a threaded terminal. Check your engine and maintenance manual for the correct spark plug and only use as...

Mercury - Mercruiser 19-8M0214985 PVS Vent Plug
Mercury - Mercruiser 19-8M0214985 PVS Vent Plug Genuine OEM Mercury - Mercruiser propeller vent plug. Solid PVS vent plug (A46 A47 A48 P/N suffix) Supersedes: 19-856622, 19-889725

Mercury-Mercruiser 35-866340K01 Oil Filter
Mercury-Mercruiser 35-866340K01 Oil Filter This OEM oil filter is constructed with a high-efficiency design that allows for the constant flow of oil to vital engine areas. The unique filtration system screens particles smaller than 1/1000th of an inch...

Sierra 18-4226 Drain Plug Replaces 22-806608A02
Sierra 18-4226 Mercruiser Blue Plastic Drain Plug This Sierra 18-4226 drain plug is widely used for Mercruiser V4, V6 and V8 marine engines. Fits Mercruiser cylinder blocks and exhaust manifolds Comes complete with o-ring Interchangeable...

TFXtreme Control Cable for Johnson, Evinrude, OMC 1979 & Newer
TFXtreme Control Cablefor Johnson, Evinrude, OMC 1979 & Newer Teleflex is a leading manufacturer of marine parts including steering parts which includes TFXtreme control cables and is industry-renowned for their innovation in boat controls and...

Johnson Evinrude XD50 2-Stroke Synthetic Marine Oil
Johnson Evinrude XD50 2-Stroke Synthetic Marine Oil For use in Evinrude E-TEC, Evinrude Direct Injection, Oil Injected, and Carbureted 2-Cycle Outboards. Do not trust your marine engine to just any oil, Evinrude has been manufacturing the finest engine...
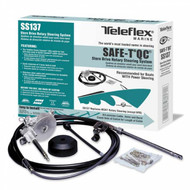
Safe-T QC Rotary Steering Kit
SeaStar Solutions/Teleflex Safe-T Quick-Connect Rotary Steering System The Safe-T QC rotary steering kit provides quick and responsive three-turn steering with easy installation using a patented, no tools process. Note: requires cable connection at the...
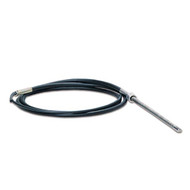
Teleflex Safe-T QC Steering Cable
Teleflex Safe-T QC Steering Cable SSC62 The SSC62 Steering Cable is a standard quick connect rotary steering cable. It features a snap connector for easy installation and a trapped nut that stays in place during cable routing. Featuring the patented...

NGK BR6FS Spark Plug
NGK BR6FS Spark Plug The NGK BR6FS Spark Plug is a standard NGK plug. NGK Standard plugs are an OE cornerstone that have provided decades of reliable performance. The solid copper core offers superior heat dissipation, conductivity, and broad heat range...

Teleflex CCX179 TFXtreme Control Cable Mercury
Teleflex CCX179 TFXtreme Control Cable Mercury When looking to replace Mercury Control Cables, those that provide smooth operation without excess motion are recommended. With it’s unique splined core TFXtreme control cables deliver that effortless...
Marine Engine Parts
To keep your boat running well season after season, call Wholesale Marine. Our team of boating pros will be glad to guide you on how to maintain and protect your investment. Our 5-star manufacturers cover every major player in the business- Honda , Evinrude , Mercruiser , Volvo , Mercury , Suzuki , Tohatsu , OMC , Yamaha and Johnson , just to name a few. You can be sure we’ll have the outboard motor parts you need to keep your mechanical system in top form. There are a couple ways to locate the engine parts you need: Use our Marine Engine Parts Finder , or give us a call at (877) 388-2628 and speak with someone on our team.
Outboard Motor Parts You Can Rely On
Did you know? There are two types of boat parts to choose from: Original Equipment Manufacturer (OEM) or aftermarket. If your boat is new, or has seen only a couple seasons of use, your OEM will be the preferred way to go. For your convenience, Wholesale Marine keeps a huge inventory of these replacement marine engine parts on hand. Yet OEM parts may be too expensive for some of us. And for older, well-preserved boats, OEM parts may no longer be available. Should you opt for aftermarket outboard motor parts, no worries, Wholesale Marine has your back. We stand by the products that we sell, since many of today’s aftermarket parts undergo the same quality testing as OEM parts. The only difference is price as aftermarket parts cost far less than their OEM cousins.
You can always depend on Wholesale Marine to carry the outboard motor parts you or your marine mechanic require. To locate the right parts use our convenient Engine Parts Finder, or if you prefer, just ask for our help. We are always glad to help and to offer professional, experienced advice. Another perk: same day flat rate shipping for most items. Returns are easy, and you’ll always receive the best customer service and advice. Be sure to ask about our Captain’s Club Rewards Program for additional savings. Call us today at (877) 388-2628. We’re here Monday through Friday from 8:30 AM until 4:30PM EST. We welcome your call!
Subscribe to our Newsletter
Get the latest updates on new products and upcoming sales
Oops, something went wrong. Please try again.
You are now logged in!
JavaScript seems to be disabled in your browser. For the best experience on our site, be sure to turn on Javascript in your browser.

- Create an Account
Boat Motor Parts

Boat Motor Parts and Accessories
Boat motor maintenance is an important aspect of owning a boat, and it is vital to have the right boat motor parts and accessories to ensure your boat operates at optimal performance. Whether you are a seasoned boater or a novice, getting the right boat motor parts and accessories is essential for your boat's longevity and efficiency.
One of the best places to get the boat motor parts and accessories you need is from iBoats. iBoats is a leading online retailer of boat parts and accessories, and they offer a wide variety of boat motor parts and accessories from top brands, including Yamaha, Mercury, and Evinrude.
When shopping for boat motor parts and accessories, it is essential to know the make and model of your boat motor to ensure you purchase the correct parts. iBoats makes this process easy by providing a search feature on their website that allows you to filter your search results based on your boat motor's make and model.
iBoats offers a vast selection of boat motor parts and accessories, including propellers, fuel systems, ignition systems, and much more. They also offer a wide range of accessories, such as steering wheels, gauges, and lighting, to enhance your boating experience.
In addition to their selection, iBoats offers competitive pricing and excellent customer service. Their website is user-friendly, and their customer service team is knowledgeable and available to help you find the boat motor parts and accessories you need.
If you are in the market for boat motor parts and accessories, iBoats is an excellent option to consider. With their wide selection, competitive pricing, and exceptional customer service, they are a top choice for boaters looking to ensure their boat is operating at optimal performance.
Engine Parts & Systems How-Tos
How to change oil in an outboard (video).
Video demonstration on how to change the oil in your outboard engine, presented by Walleye Workshop.
Video Transcript
Hi, welcome back to WalleyeWorkshop.com. I'm at the point here, with the engine hours, where I need to change my oil. We meant to do it a couple of weeks ago at 80, but I'm up to about 95 hours now. So changing the oil on a Verado is very simple.
First thing you need to do, tilt your motor all the way up that way if there's any oil trapped in the engine it will give it a chance to drain down into the sump. You only need to do this for about a minute, then you tilt it back down and you can get started with the rest of the oil change. But as long as we've got it up, make sure you know where the oil drain is on this throttle, it's right up here under the plate above the cavitation plate. So that's the oil drain, pretty simple you just uncork that dude and drain it right into the oil pan and surprisingly it comes out with very little mess if at all. I'm going to trim this motor down and we'll get started.
Okay, just before we pull the drain plug we're going to go ahead and take the top cowling off. Now this giant motor has two separate cowlings. You've got the top and you've got this back panel back here. We don't need to remove the back panel to change the oil. It's a pretty simple operation.
Alright, I'm ready to drain the oil. Like I showed you earlier, the drain plug is right under here, under this surface here. The nice thing about this job is the only tools you need is a 12mm wrench and a filter wrench. The 12mm wrench will go right on the drain plug. Make sure you turn it the right way. Once you get it loose, get a hold of it with your hand. You don't want it to drop and fall down the hole in your catch pan. So once you feel that thing starting to break free, just pull your hand out of the way, guide your catch pan right where it needs to be. Make sure your gasket's still here on the screw and not stuck up here, because that could end up falling off down the drain and you won't have a gasket.
One of the tricks you can do, if you don't have enough room under your skeg, lower your jet stand in the front of the boat. That brings your skeg up and you get your catch pan under real nice. Okay, with the oil still draining down in the catch pan, we're going to go ahead and take the oil filter off. Now filters are kind of mounted upside down and they're located on the starboard side of the motor, towards the front, come off pretty easy, easy access. Just use the filter wrench. You don't have a filter wrench, run up to Napa or any of the hardware stores and get yourself one. You don't want to tear it up trying to get it off. Because it's mounted upside down like this, most of the oil drains out the filter before you pull it off so you don't end up with a big mess in your garage. That's it, as simple as that, dirty problem filter.
Okay, now all we have to do is throw the new filter on. What we need to do first is oil up the bottom side of this gasket with clean oil, not the dirty stuff that came off there. Now we're ready to install. I just got a bottle of oil here, just get my finger down in there, make it all nice and slick, just install the filter. One thing about the filter, as soon as it gets snug, as soon as that gasket touches that housing surface, you're 3/4 of a turn no more. You can see the label here, I'm just going to turn this around till the label's approximately facing forward around the boat. That's about 3/4 of a turn, all done.
Okay, we've got the oil drained. We've got the filter on. Now we just have to get the plug back in the oil drain and we'll go on top, and we'll fill the oil. This motor takes 7 liters of oil. Alright, now we've got the plug back in, the filter's on, the next thing we do here is just load the load the Verado with oil. The oil fill is located on the rear of the motor, on the top, that yellow button, that yellow knob. Don't forget to put that back on. I'm going to use a filter, or else you don't want oil spilling all over the place. But before you put any old filter on there, wipe it down nice and clean. You don't want any foreign material getting down into your engine.
Okay, like I said, it takes 7 liters of oil. So that's"¦ this is a 4 liter bottle, so I'll put one of these in and most of the rest of the second bottle. You need a ladder for this job. To get any of the oil that's kind of stuck in the part of the block down under the sump, like it's recommended in the manual, tilt the motor all the way up for about a minute. That should settle it out, then tilt it back down. The rest of your oil should be in the pump, or in the sump rather, then go check your dip stick.
Alright, the motor has set up for about a minute so now we just have to check the dip stick to see where it's at. The dip stick is just inside, portside of the motor, the big round yellow handle, you can't miss it. You look there's a cross hatch section on the dip stick, this is the section we want the oil to be in. You don't want it over, you don't want it way at the bottom, somewhere close to the top, doesn't have to be all the way to the top. Get the dip stick all the way back in, then pull it out. We're still a little low, the oil might need to settle a little bit longer.
Alright, we must have done a good job draining the oil because it took all of 7 liters to get that oil up into the cross hatch area of the dip stick. So that's good though, we got rid of all the old oil, now we've got brand new oil in it. We're good to go for the next 100 hours or a year of use, whichever comes first.
One of the things recommended in your manual, is to run the motor for about 5 minutes while you're in the water or hook up a hose to it on the hose attachment on the side of the motor. Run it for about 5 minutes and make sure you're not leaking any oil around the oil seal. So we're going to go ahead and fire it up, one of my favorite things to do in the garage.
Alright, so that's it. We ran the motor for about 5 minutes or so. No leaks around the oil filter, that's the purpose of running the motor for 5 minutes in the garage or in the water. Basically, everything I showed you here is in the manual word for word. Always, always refer to your Owner's Manual and put in the recommended oils for your model, the recommended filters. If you're not comfortable doing it yourself, take it to your dealership. They'll be more than happy to change your oil for you.
Well, that's it for this week. Don't know what we're doing next week. Mike's been out of town goofing off at the lake and woods with Mark Rumba, but we'll figure something out. Thanks for watching. See you.
How to Replace an Outboard Water Pump (Video)
The step by step process for replacing an outboard water pump on your outboard engine, presented by outboard technician Phil Batista of Burr Brothers Boats in Marion, Massachusetts and Boating Local/New England Boating.
[Tom] Hi, Tom Richardson for Boating Local. And today I'm back from Burr Brothers Boats in Marion Massachusetts where outboard technician Phill Batista is going to show us how to change the water pump on this 2004 Mercury Optimax Outboard. Now the water pump should be replaced on an outboard or IO roughly every other season. And the reason why, is because the rubber impeller that spins around inside the engine and provides cooling water to the power head could fail or deteriorate over time. And that can cause a big problem if it happens to go while you're on the water. What's the worst-case scenario?
[Phill] The best case is if they all break off. They don't go anywhere, they kind of just sit there.
[Narrating] As mentioned, the water pump impeller can become brittle over time causing the veins to break off and possibly clog the intake system. However a more common problem as Phil explains is a lack of suction caused by a loss of elasticity.
[Tom] Yeah, compared to like this, it' all, they are all straight.
[Phill] Yes this is a brand new one. And they develop impeller memory. Okay so when these things sit in that cup. And when we take the whole unit apart you'll see what I mean. When they sit in the cup, the blades are kind of bent over to one side. And when they sit like that they kind of lose their elasticity. So they don't have enough tension to rub against that to make that nice seal in the water pump housing.
[Tom] So you're not getting that kind of pressure that you need.
[Phill] You can lose pressure. So the first thing you want to do is pop this little cap. It's going to expose a bolt down there that removes this anode plate down below under the anti-ventilation plate. Make sure thing is in gear or in neutral, as long as you remember where it's at. I like to keep it in neutral. I think these nuts. [Tom] Can leave it right on there.
[Phill] You can leave it right on there and now we are going to set this thing down. Just give it a quick hit on the skeg. That knocks it loose and she's ready to come down. You can see.
[Tom] That was fairly simple.
[Phill] There are a couple of open ports here. So once I slip this down, you're going to want to be your peto-tube. And you want to push down on that. On that little black piece of plastic right there; push down on that at the same time. I'm just going to set the skeg on my lap. I'll be able to pull that tube right out of there. This is a coupler for your shift; your shift rod coupler and here is your driveshaft. Just like that. Nice and easy, just like that. Mercury makes light stuff.
Where going to start taking the water pump apart. A little bit of grease on, that's good, that has been done before. They kept up with the water pump service on this thing. The new kit comes with these installation tools.
Slide right off there. So now you just pop that right off. So here is your impeller. That's your stainless steel housing; we're going to re-use that. That does not come in the kit. Here is your weigher plate; that's where your impeller rides on. Your water comes up through there. We'll just peel that up. There is a little intake screen. There is a little passage underneath this. We have some gasket scraping to do afterwards. So basically we just get a razor blade and try not to knick the meeting surface too much.
possibly preferably. But just scrape up that gasket; you want a good clean meeting surface for the gasket because you can lose water through there.
[Tom] Sure so you want to just keep it nice and smooth as possible.
[Phill] Correct.
[Tom] So we don't just.
[Phill] Just taking a little bit of cleaning degreaser to soften up some of that gasket and just take a nice sharp razor blade and go over it and scrape up any remains of any gasket material we have left. You can see it looks pretty nice. And voila, now we have a new clean surface now to install the new gasket.
So basically now what I'm going to do is I'm going to blow this out and get to rid of any little bit of gasket that might have fallen into this little recess right here. Ready, watch your eyes. Phillips screwdriver is here and there are holes those little dimples in the carrier; we will just kind of walk it up, nice and easy. It's that easy.
Slide that up, look at the seals, they look pretty good. But, we are here, we're going to replace it. We're just going to clean this up a little bit. Alright here is the brand-new carrier. We're going to take some Mercury 2-4-C, its brown in color and apply it to the O-ring. Just a little bead, put it on the outside of the O-ring there where it sits inside the gear case, as well as a little bit on the seals; on the inside lips of the seals. That way we don't damage the seals upon installation. I'm just going to set this aside because I'm going to have to clean off those drive-shaft splines, as you can see they have got a little bit of old grease on them. Clean wipe with some cleaner-degreaser. Put it on and wipes. You get up there and you just clean it off.
Caked on stuff that aid in the installation of that carrier. We want to make sure that we don't leave any on the top here because we don't want to have a hydraulic effect up in the crank-shaft. You would never get the thing bolted up. Well you will get the bolted up but you might cause a little bit of damage to the crank-shaft, which would render the motor.
[Tom] So don't get and make sure the grease is not on the dirty top.
[Phill] Exactly! Not sitting on the very top. I just rub my thumb over it just to make sure there is nothing there. We're ready to install that carrier. Let me just fit that out. Always try to orient the dimples on this carrier so I can remove it the next time. And we just slide it on nice and easy. All the way down. No special tool needed here. I will just show you what I do. I think that it is a 7/8 that goes over that nicely. And you just tap it home nice and easy.
And you will know if it is not because you won't be able get the weightier plate down on their flush. So we're almost there. The drain screws because you get a little bit of pressure.
[Narrating] If the carrier does not fully seat, you may need to open the oil fill port on the lower unit to release the pressure.
[Tom] Obviously you don't want it coming out.
[Phill] I don't want to drain the lubricant. So we just crack that. See that, there was a little bit of pressure. Now she will go in the rest of the way. So we have our gaskets laid out here and we're just going to set them down in place. It might take a couple of tries here. I guessed wrong; it will got his way. Here we go.
[Tom] So it's important to have it on the right side?
[Phill] Correct! I mean it's only going to work one way because of the bolt holes, you can only install it one way. And if you want "¦.
[Narrating] To ensure that the gasket and housing are installed perfectly, Phill places two alignment pins in the bolt holes.
[Phill] So we have that down. Now the kit. You can definitely feel which sides go down. This side is rounded you can see a little bit of a chamfer on all these openings here. And on this side it's kind of sharp and you want the rounded side up. So we know that goes down there. Set that down there and now we have the other gasket. Let's get rid of this, we don't need that anymore. The little rubberized side there goes up. I like to take a little bit of grease, put it on the backside of the key. I'm always dropping stuff. Just enough to hold it and the cut out is right there, it's these ports. Nice.
[Narrating] To aid in installing a new impeller, Phill sprays the housing with soapy water.
[Phill] And basically you got to kind of get your orientation correct because you want the impeller blades rotating in the right direction. The drive shaft is going to be spinning clockwise, so we want the impeller veins to be oriented clockwise. Basically you've got your impeller housing here. We got it all soaped up and we just kind of force it right in there. Now one just got bent the wrong way. Spin it, seat it, I usually put the key way up front. That way I know that when I slip this assembly down onto the drive shaft, I know that this is going to be 12 o' clock, 12 o' clock and just slip that on there and down she goes.
I'm just going to kind of make sure that we get the key lined up. We have to; there's a little bit dab of grease on them just to slip them out the next side. Let's get that in there. We'll get them all greased up first and set them aside.
[Tom] Is it ok to be dropping these in like that?
[Phill] Just want to get these things hand tight; not too crazy. So now the torque is down, 60 inch pounds confirmed in the manual. Going in a crisscross pattern. It hasn't clicked yet but I just want to tighten them all down. Come back here click. Clean up some of this mess here. Just a little bit of degreaser just to make sure everything's clean.
Take this shift-rod coupler off because we're going to install that on the shift-rod coming down through the mid-section. To aid in installation, I'm just going clean some of that old grease off. Just throw a little dab on there. Again you don't want to put too much in there for the same reason that we don't want to put too much on the top or any on top of the drive shaft. Because they have two pieces meeting in this coupler and if you have got grease in there, it's not going to go anywhere, it's not going to push it out. So you just want to be sparing with the grease, you don't want too much.
Just put that down. Slide down about there and they give you a little installation tool and they just want you to push that thing all the way down. Just a little touch there. Okay so now were ready to take this up and put it back in the engine. We got the gear case back. There are a couple of things we're going to check on the mid-section of the outboard before we throw the whole unit back up in there. One of them is this little joint that connects the water outlet of the water pump to the water tube that delivers the water to the engine; the cooling water to the engine. There is an O-ring right there that were going to replace. It is part of the kit and we're going to dig it out with a pick or a screw driver or there is a handy dandy little pick tool here. Dig it out, here it is. Did I bring the kit? Old O-ring new O-ring and we're just going to place that in there. I'll try not to stab myself with the pick and that's it.
This greases are different especially in a salt water environment. There is one up here and oops there's another one. And let's pour a little bit on there, and we're going to install this on the lower unit side of the engine. I'll put it right there. It will aid in the installing the unit and getting everything wound up. And we're going to take this piece off the shift-rod coupler and we're going to put it on the other side. At least that's how I do it. It just seems to make a heck of a lot more sense to do it this way. I'll throw a bit of grease up in there too without getting on too much. Oops! So that way it gives us more of an area in which to line up the shift-rod, the water tube and the peto-tube and the studs. Some grease here.
It's a very good bolt water grease; we don't want to get too much on the treads. Basically we just want to get the upper part of these studs so they don't seize. We want to lay a seal; a bead of black silicone here right across this divider block before we actually install our unit.
Now we want to make sure our drive shaft goes up in the right spot. And that sits right there, we just proceed all the way up until you get a bump here. And I'll stand up, try to locate the peto-tube and install that. A little tug to make sure that it's in there and now we'll carefully install the unit.
[Narrating] The drive shaft doesn't fully insert on the first try. You may need to have another person slowly spin the flywheel by hand until the drive shaft's spline alliance with the coupler on the power head. However only do this if the batteries have been disconnected first. It may also be necessary to manipulate the shift rod until the shift rod coupler outlines with the splines on the lower unit.
[Phill] Basically if the gear case doesn't want to slide up and in right from the beginning, don't tighten these up. You know you've got to make sure that you can get that kind of mating between the lower unit and the mid-section before you tighten any fasteners.
So we're ready to go ahead and loosely install these fasteners back on the studs. Put the washer, you want to get everything started first before you tighten anything up fully. Right here at the backside of it just to keep salt from getting into the treads. Just put that in here. This is not tight, until we get everything else snugged up.
I was just finished torqueing the lower unit bolts, the fasteners, the bolts and the nuts. 55 foot pounds as per the service manual. And the only thing left to do is the final assembly and final checks. Basically were just going to put the zinc anode back under the anti-ventilation plate and test run it to make sure it pumps water out the telltale.
The final step of the operation here is we're just going to do a brief test run to make sure it's pumping.
[Tom] Thanks a lot Phill for walking us through another water pump replacement. You make it look easy but as we've seen there is a lot more to it than most people think.
[Phill] There is. It's definitely not for an entry-level do-it-yourselfer. It can be involved. It can be a handful if someone has never done it before.
[Tom] That's right but at least as you showed us, there are other reasons besides the water pump like the impeller replacement. There are other things you want to keep you know lubricated that you want to take a look at every once in a while and some of the things don't seize up.
[Phill] Correct! Yes it's a peace of mind just to take things apart, just to get to look at them and like you say get a little bit of grease on it. So the next time you need to take it apart, it will come apart.
[Tom] That much easier right, well great. Thanks a lot Phill and I'm Tom Richardson for Boating Local. Thanks for watching.
For more how-to boating videos, as well as news and information on boating and fishing in New England, visit NewEnglandBoating.com. (Permission given by Tom Richardson.)
How to Perform a Leakdown Test on your Outboard Engine (Video)
Learn how to perform a leakdown test on your outboard engine, presented by Boating Local/New England Boating.
[Tom]. Hi Tom Richardson for Boating Local and I'm here in the outboard engine department at Burr Brother Boats in Marion Massachusetts where the guys here have been presented with an interesting case. The owner of this 2.5 hp Yamaha outboard had an overheat issue and they're concerned that there might have been some internal damage caused to cylinder or perhaps a gasket or seal.
And there's a couple of different ways to go about checking for this kind of damage. One is what's called the compression test where you hook up a gauge and a hose to the cylinder through the spark plug opening. Turn over the engine and see if you get the correct reading on the gauge. The other more thorough way to test for problems is called the leak down test. And that's something that technician Jeff Harrison is going to walk us through right now.
[Narrator]. With both the compression and leak down test the engine should first be brought up to operating temperature. To get started on this particular engine, Jeff removes the internal fuel tank and the cover plate to expose the flywheel.
[Jeff]. The spark plug out.
[Narrator]. Before hooking up the compressed air and leak down gauge to the cylinder, Jeff first calibrates the gauge to the zero setting.
[Jeff] Alright, screw the adapter in. Hook up our gauge. We have hooked up the air to the cylinder. Now we have to get it up at top dead center. So we can seal off the cylinder. We get our reading. See it's about 2% and this gauge right over here. Very likely case so I would say this motor is in good shape.
[Tom] Well Jeff a 2% leak down rate, I guess that's pretty good. So the owner lucked out in this case. But you know, say there was a problem, what are some of the things you would encounter?
[Jeff] Well an overheat, most likely would probably scorch pistons, rings and we probably would've seen air escaping through the breather tube, which is right here. That's where the breather tube connects. You hear it actually coming out.
[Tom]. You said you hear it. You hear it whooshing out, okay.
[Jeff]. And the other thing, just as a check-up on your engine if you were to do a leak down test; is the condition of valves. If you had an intake, you would hear it coming out the intake of the carburetor.
[tom]. Right.
[Jeff]. Exhaust valve, you would hear it coming out of the exhaust. So if you find that it's a valve, a lot of times all you might need is just some additives in your gas. We have seen that works. And then you do a leak down test again and it's fine.
[Tom]. Well sometimes it's a simple fix, sometimes not so much so. Anyways well thanks Jeff for walking us through the leak down test. We'll be back for more outboard maintenance and servicing tips with Jeff and the rest of the gang here at Burr Brothers Boats. I'm Tom Richardson for Boating Local, thanks for watching.
- Mercury Outboard Parts 386 items
- Mercruiser Boat Engine Parts 566 items
- Suzuki Outboard Parts 53 items
- Yamaha Outboard Parts 325 items
- Evinrude Outboard Parts 398 items
- Johnson Outboard Parts 396 items
- Honda Outboard Parts 47 items
- Volvo Penta Sterndrive Parts 206 items
- Chrysler Outboard Parts 86 items
- Force Outboard Parts 87 items
- Indmar Sterndrive Parts 2 items
- Kohler 5 items
- Marine Power Sterndrive Parts 9 items
- Mercury Race Outboard Parts 20 items
- Mercury Race Sterndrive Engine Parts 6 items
- Mercury Sport Jet Engine Parts 52 items
- Nissan Outboard Parts 16 items
- OMC Inboard Parts 35 items
- OMC Sterndrive Parts 244 items
- Sears Outboard Parts 10 items
- Tohatsu Outboard Parts 16 items
- US Marine Outboard Parts 84 items
- Westerbeke 11 items
- Boat Controls & Rigging 53 items
- Gauges, Compasses & Instrumentation 65 items
- Steering Systems 129 items
- Cooling Systems 522 items
- Drive Parts 272 items
- Electrical Systems 274 items
- Fuel Systems 431 items
- Generator Parts 17 items
- Ignition Systems 297 items
- Internal Engine Parts 379 items
- Engine Fluids & Cleaners 39 items
- Trim Tabs, Hydrofoils, & Skegs 36 items
- Miscellaneous Parts 22 items
- Miscellaneous Seals & O-Rings 100 items
- Oil/Lubricant 26 items
- Outboard Motor Jack Plates & Brackets 10 items
- Tools & Shop Accessories 41 items

Please verify you are a human
Access to this page has been denied because we believe you are using automation tools to browse the website.
This may happen as a result of the following:
- Javascript is disabled or blocked by an extension (ad blockers for example)
- Your browser does not support cookies
Please make sure that Javascript and cookies are enabled on your browser and that you are not blocking them from loading.
Reference ID: 1d63fa98-621b-11ef-aa58-066333e8ca09
Powered by PerimeterX , Inc.

IMAGES