- New Sailboats
- Sailboats 21-30ft
- Sailboats 31-35ft
- Sailboats 36-40ft
- Sailboats Over 40ft
- Sailboats Under 21feet
- used_sailboats
- Apps and Computer Programs
- Communications
- Fishfinders
- Handheld Electronics
- Plotters MFDS Rradar
- Wind, Speed & Depth Instruments
- Anchoring Mooring
- Running Rigging
- Sails Canvas
- Standing Rigging
- Diesel Engines
- Off Grid Energy
- Cleaning Waxing
- DIY Projects
- Repair, Tools & Materials
- Spare Parts
- Tools & Gadgets
- Cabin Comfort
- Ventilation
- Footwear Apparel
- Foul Weather Gear
- Mailport & PS Advisor
- Inside Practical Sailor Blog
- Activate My Web Access
- Reset Password
- Customer Service

- Free Newsletter

Catalina 270 vs. The Beneteau First 265 Used Boat Match-Up

Ericson 41 Used Boat Review

Mason 33 Used Boat Review

Beneteau 311, Catalina 310 and Hunter 326 Used Boat Comparison

Tips From A First “Sail” on the ICW

Tillerpilot Tips and Safety Cautions

Best Crimpers and Strippers for Fixing Marine Electrical Connectors

Thinking Through a Solar Power Installation

Polyester vs. Nylon Rode

Getting the Most Out of Older Sails

How (Not) to Tie Your Boat to a Dock

Stopping Mainsheet Twist
Fuel Lift Pump: Easy DIY Diesel Fuel System Diagnostic and Repair

Ensuring Safe Shorepower

Sinking? Check Your Stuffing Box

The Rain Catcher’s Guide

What Do You Do With Old Fiberglass Boats?

Boat Repairs for the Technically Illiterate

Boat Maintenance for the Technically Illiterate: Part 1

Whats the Best Way to Restore Clear Plastic Windows?

Giving Bugs the Big Goodbye

Galley Gadgets for the Cruising Sailor

Those Extras you Don’t Need But Love to Have

What’s the Best Sunscreen?

UV Clothing: Is It Worth the Hype?

Preparing Yourself for Solo Sailing

How to Select Crew for a Passage or Delivery

R. Tucker Thompson Tall Ship Youth Voyage

On Watch: This 60-Year-Old Hinckley Pilot 35 is Also a Working…

On Watch: America’s Cup

On Watch: All Eyes on Europe Sail Racing

Dear Readers
- Boat Maintenance
- Sailboat Reviews
How to Restore Teak Wood on Boats
Probably nothing can make or break the appearance of a fiberglass boat more quickly than the appearance of the exterior teak trim. Contrary to popular belief, teak is not a maintenance-free wood that can be safely ignored and neglected for years at a time. Though teak may not rot, it can check, warp, and look depressingly drab if not properly cared for.
Although it is not immune to neglect, teak is incredibly resilient, and can be brought back to life after remarkable amounts of abuse. Therefore, there is no excuse for drab, ugly exterior teak on any boat.
Unlike other woods used for exterior trim, the grey weathering of teak rarely extends very far below the surface of the wood. Instead of the tedious scraping and sanding essential to restore the weathered surface of, for example, mahogany, a fairly simple chemical cleaning usually suffices to bring even the worst of grungy teak back to a semblance of its original glory.
However, chemical cleaning can be pretty tough on the wood. Most chemical cleaners rely on a caustic and/or an acid to clean and bleach the surface of the wood. Inevitably, these powerful cleaners gradually erode the surface, softening the pithy portions of the grain and leaving raised ridges along the tougher growth rings of the wood.
Chemical cleaners can, however, almost miraculously clean weathered teak. The four-color brochures published by teak care product companies do not exaggerate when they show bright tan teak next to grey ugly teak, claiming that only a few minutes work will transform the dirty to the clean.
For best results, however, you should never let your teak trim get to the point that such drastic measures are called for: and once you get it back to like new condition, you should be prepared to put in the time and effort required to keep it in that condition.
Cleaning Teak on Boats
If your teak is dark brown from old, oxidized dressing, or weathered grey from neglect, the first step is a thorough cleaning.
The severity of the discoloration of the wood will determine the severity of restorative measures required. Because cleaners containing acids and caustic are hard on the wood, you should try to use as mild a cleaner as will do the job, even though it may take some experimentation and a few false starts to come up with the right combination of ingredients.
The mildest teak cleaner is a general purpose household powdered cleaner such as Spic n Span . A concentrated solution of powdered cleaner and vigorous scrubbing using a very soft bristle brush or, better yet, a 3M pad, will do a surprisingly good job on teak that is basically just dirty. Don’t scrub any harder than you have to, and always scrub across the grain. Every time you scrub the teak, you are removing softer wood, which eventually results in an uneven surface that raises the grain. Regularly using a firm brush to scrub with the grain will lead to problems down the road.
The advantage of a gentle scrub using mild cleaners is that while it is more work for you, it is by far the most gentle for your teak. Since you are likely to have some powdered detergent around, always try this method before going on to more drastic measures.
Simply wet down an area with water, clean with the detergent solution, rinse with fresh water, and let it dry. If the wood comes out a nice, even light tan, youre in luck. If its still mottled or grey, a more powerful cleaner is called for.
The next step is a one part cleaner specifically designed for teak, or the equivalent. These can be either powdered or liquid. Most consist of an abrasive and a mild acid, such as phosphoric acid or oxalic acid. They are more effective in lightening a surface than a simple detergent scrub. Many household cleaners like Barkeeper’s Friend contain oxalic acid.
If the cleaner contains acid, however, some care in handling must be taken. It is advisable to wear rubber gloves and eye protection using any cleaner containing even a mild acid.
The cleaning procedure with most one-part cleaners is the same: wet the teak down, sprinkle or brush on the cleaner, scrub down, and rinse off. Be sure to rinse well.
Even badly weathered teak should come up reasonably well with a one part cleaner. When the wood dries, it should be a uniform light tan. If some areas are still grey, a repeat cleaning should do the job. If, however, the teak is still mottled or discolored, the time has come to bring out the heavy guns, and with them the heavy precautions.
The two part liquid cleaners are, with only a few exceptions, powerful caustics and acids which do an incredible job of cleaning and brightening teak, but require care in handling to avoid damage to surrounding surfaces, not to mention your own skin.
While the instructions on all two-part cleaners are explicit, a reiteration of the warnings on the labels is useful.
Adjacent surfaces, whether gelcoat, paint, or varnish, must not be contaminated by the cleaners, most of which can bleach gelcoat or paint, or soften varnish. Constant flushing of adjoining surfaces with water while cleaning is usually adequate, but masking off of freshly painted or varnished surfaces may be more effective.
Hand protection, in the form of rubber gloves, is absolutely essential. In addition, do not use these cleaners while barefooted, and preferably not while wearing shorts. Eye protection is also a good idea. The chemical burns which can result from some cleaners can be disfiguring and painful. If the product label has the key words caustic, corrosive, or acid, wear protection and avoid splashing!
There is slight variation in the instructions for the various two-part cleaners, but the general principles are the same:
1. Wet the teak down;
2. Apply part one (the caustic), spreading and lightly scrubbing with a bristle brush;
3. When the surface is a uniform wet, muddy brown, apply the second part (the acid), spreading with a clean bristle brush;
4. Apply and spread enough of the acid to turn the teak a uniform tan;
5. Rinse thoroughly, and allow to dry completely.
It is fairly common to use almost twice as much of the second liquid (the acid) as the first, in order to get uniform light color. For this reason, its a good idea to buy an additional bottle of the second solution, when it is available. Despite the fact that most manufacturers package two-part cleaners in kits of two equal-sized bottles, they usually make additional bottles of the second part available.
Unless the instructions require it, do not rinse off the muddy brown surface of the teak after it has been treated with the caustic. You will be washing unneutralized, corrosive liquid all over the rest of your boat. Thorough neutralizing with the acid wash will minimize problems.
Surface Preparation for Finishing
A freshly cleaned teak surface is a joy to behold, but it wont stay fresh, clean, and light for long if you don’t take care of it. In fact, the surface will begin to oxidise instantly as it dries. The sooner you complete treatment after cleaning, the better.
Teak, like many woods, has grain which varies a great deal in hardness, even within the same piece of wood. Over time, even a simple scrubbing with detergent will wear away the softer portions of grain, leaving ridges of harder grain. The irregularity of such a surface merely accelerates the rate at which it gets dirty again.
Before getting out the sander to smooth out the grain, however, look at both the function and construction of the wood youre dealing with.
If the teak surface youve cleaned is teak-faced plywood, theres a good chance that a thorough sanding to smooth the surface will go right through the layer of veneer, effectively ruining the piece. On the typical fiberglass sailboat, veneered or plywood components include conpanionway drop boards, hatch tops, and sometimes cockpit seats and soles. Before sanding any of the parts, examine them carefully to see if they are solid lumber or veneer. Since exposed edges of plywood are sometimes covered with veneer strips to make them look like solid lumber, you must look pretty closely.
Although decks are usually solid lumber, they also can present problems. If the decking is much less than 1/2″ thick, and has plugged (bunged) fastenings, sanding out the grain ridges may sand away enough material to sand through or loosen the bungs, exposing the fastenings.
Even when bungs are set in epoxy, they require a counterbore at least l/8″ deep to hold them in place.
Even if the grain is quite pronounced on laid teak decks, you may be better off living with a cleaned irregular surface than opening Pandoras box by trying to create a perfectly smooth surface.
On other solid teak items such as handrails, toerails, and Dorade boxes, thorough sanding of the chemically cleaned surface before treating with a sealer will result in a much more attractive surface.
Do not, as we have seen many times, attempt to restore badly weathered and grey teak by sanding before chemical cleaning. Chances are that you will quickly discover that a discouraging amount of sanding is involved, and you will end up using a chemical cleaner in any case. Sanding both before and after treatment is a waste of effort, and is likely to remove more wood than is necessary. On teak with pronounced surface irregularities, it could take forever to sand them out to get a uniform surface color, while chemical cleaning will quickly lighten even the deepest gouges or grain defects.
Wait until the cleaned teak is thoroughly dry before sanding or applying teak dressing.
Sanding of cleaned teak is not always required, particularly if the surface is to be treated with an oil-type dressing rather than a gloss finish such as varnish. Surface irregularities show far less with the matte finish of teak oils.
Granted, perfectly smooth teak is likely to be more even in color, and some esthetic sensibilities are offended by a surface showing pronounced grain pattern. From a simply functional point of view, however, irregularities are unimportant except in terms of simplified cleaning in the future.
Unless you intend to put in the effort required to maintain your teak between major cleanings, sanding the teak smooth is a waste of time. The next chemical cleaning will simply repeat the grain-raising cycle, requiring another sanding.
If you swear youre going to keep the teak up, however, a good sanding will enhance the woods appearance.
The safest tool for general sanding is a high speed orbital sander such as the Makita B04510. If you use successively finer grades of aluminum oxide sandpaper, and don’t slow the machine down by applying pressure, it will leave a smooth, relatively swirl-free surface suitable for finishing with a teak dressing.
Inexpensive, heavy, slow-speed orbital sanders should be avoided. They leave telltale swirl marks on the surface which are accentuated by the application of finish, and their sanding is generally too slow.
Never use a disc sander on a surface to be finished bright (oiled or varnished), unless you are one of the few experts who really know how to handle this potentially destructive tool.
The same goes for the belt sander. It is perhaps the most efficient tool for smoothing large, flat surfaces, but is capable of doing heartrending and irreversible damage in the hands of the inexperienced. For decks and hatches of solid lumber, the belt sander is the answer – but only if you are thoroughly experienced with the tool, and only with a heavy duty machine that has a large sanding surface.
When power sanding, always mask off adjacent areas of gelcoat. Even lightly touching a polished gelcoat surface with a sander will damage it. The same rule applies for hand sanding.
Remove masking tape immediately when sanding is completed. Even leaving the tape on overnight on an exterior surface is likely to make it difficult to remove. Tape adhesive residue can be removed with a mild solvent, such as alcohol, and gentle rubbing with a coarse cloth, such as a piece of toweling.
After sanding, remove sanding dust from all surfaces with a vacuum cleaner. If electricity is not available, sweep thoroughly with a dusting brush or a large paintbrush which will no longer be suitable for painting because it is full of sanding dust. Obviously, you don’t sacrifice your best badger hair brush for this. The cheapest bristle brush will do fine.
Applying a Finish to the Teak
The final step in rejuvenating an exterior teak surface is the application of a dressing or sealer to retain for as long as possible the appearance of the freshly prepared wood.
Our own preference is a dressing which does not darken the wood. For our top-recommended sealer check out the six-month results of our ongoing test of wood finishes . For really durable finishes on teak trim, or caprails, there are a variety of options. Search under wood finish, or teak treatments to turn up our most recent wood finish test results . This article on varnishing also has some good tips.
The choice of a teak dressing is, however, as much a matter of esthetics as function. Look around at the boats whose exterior teak looks best to you, and query the owners about the products they use.
A major caveat is in order. No exterior teak finish lasts very long. For optimum results, monthly application of dressing is required, with a good scrubbing with detergent and water before applying a fresh coat. Youre kidding yourself if you think a once-a-year treatment will keep your teak looking good.
Do not attempt to use household-type furniture oils for exterior teak. They will not stand up to the weather.
Whatever teak dressing you use, be neat in applying it. Slopped-about teak dressing may not show when it first gets on fiberglass, but it inevitably darkens with age, leaving stains that look just as bad as varnish spills, and are just about as hard to remove. Clean up spills and overruns immediately with a rag dipped in mineral spirits unless another solvent is specified by the manufacturer of the dressing.
Masking tape is not particularly effective in protecting surfaces from spills of teak dressings, as the viscosity of most dressings is so low that they simply bleed under the edge of the tape. The answer is careful application, and careful cleanup.
Maintaining Your Teak
Your job isn’t over when the last coat of dressing is applied. To look its best, exterior teak needs frequent attention. With a boat used in salt water, frequent washdowns with fresh water will prolong the life of the dressing, but scrubbings with salt water and a brush will reduce it.
Horizontal surfaces, such as hatch covers, will require more frequent coats of sealer than vertical surfaces, such as companionway dropboards. High traffic areas like a teak cockpit sole will require the most attention of all, but are the easiest to scrub and retreat, since sanding is not usually desirable.
If all this sounds like a lot of work, thats because it is. That explains why the exterior teak on so many boats looks so grubby.
It is still, however, less work than maintaining a varnished exterior teak surface – a lot less. If you really think you want varnished teak, try maintaining a clean oiled surface for a season first.
Few things look better on a boat, particularly a white on white fiberglass boat, than well-maintained exterior teak trim. An owner who neglects exterior wood is likely to be the same owner who rarely changes the oil in the engine, and who rarely bothers to put on the sail covers after a days sail when he expects hes going sailing again tomorrow.
Owning a boat isn’t all play. A boat is a major investment, and like most investments, the more attention you pay to it, the more it will return. The time you put into maintaining your exterior teak is well invested. The return is not only pride of ownership, but dollars in your pocket when the time comes to sell the boat.
RELATED ARTICLES MORE FROM AUTHOR
Well written and informative We just bought a 21 ft 1991 celebrity Cuddy and it’s like an antique with beautiful teakwood adorning this old girl! The boat has been well taken care of but teak is teak thanks for the tips Any tips on removing the discoloration on bottom after a few rides in the river I tried washing off but won’t rinse off I guess I waited too long to rinse Is there something you can put on the bottom so that dirt doesn’t stain
Starbrite hull cleaner
What is the caulking between the teak strips (usually black) I would like to replace some that has come out.
Jimbo. There are a few different types, each with their own characteristics. Here is a test that should help you find one that works for you. https://www.practical-sailor.com/boat-maintenance/paints/teak-deck-caulks-rated-for-durability-and-resistance-to-chemicals
That’s really nice post. I appreciate your skills. Thanks for sharing.
I really enjoy the simple yet concise steps on how to restore teak wood on a boat. As teak wood outdoors is exposed to different pollutants, it can require to keep it well-maintained as long as it is used. Thank you so much this information was certainly helpful
This was certainly the best written and most informative article I have read on the subject. I recently bought a sailboat with poorly maintained exterior teak, and now I have a solid plan going forward. Thanks
Enjoy your boat comments. Would appreciate your best idea for a older boat to be sold. I have a 43’Gulf Star Trawler,well kept,that l would like to sell How would you go about this? Will appreciate your comments.
LEAVE A REPLY Cancel reply
Log in to leave a comment
Latest Videos

Hans Christian 41T – Boat Review

Seven dead after superyacht sinks off Sicily. Was the crew at...

What’s the Best Sailboats for Beginners?

Why Does A Sailboat Keel Fall Off?
Latest sailboat review.

- Privacy Policy
- Do Not Sell My Personal Information
- Online Account Activation
- Privacy Manager
Service Locator
- Angler Endorsement
- Boat Towing Coverage
- Mechanical Breakdown
- Insurance Requirements in Mexico
- Agreed Hull Value
- Actual Cash Value
- Liability Only
- Insurance Payment Options
- Claims Information
- Towing Service Agreement
- Membership Plans
- Boat Show Tickets
- BoatUS Boats For Sale
- Membership Payment Options
- Consumer Affairs
- Boat Documentation Requirements
- Installation Instructions
- Shipping & Handling Information
- Contact Boat Lettering
- End User Agreement
- Frequently Asked Questions
- Vessel Documentation
- BoatUS Foundation
- Government Affairs
- Powercruisers
- Buying & Selling Advice
- Maintenance
- Tow Vehicles
- Make & Create
- Makeovers & Refitting
- Accessories
- Electronics
- Skills, Tips, Tools
- Spring Preparation
- Winterization
- Boaters’ Rights
- Environment & Clean Water
- Boat Safety
- Navigational Hazards
- Personal Safety
- Batteries & Onboard Power
- Motors, Engines, Propulsion
- Books & Movies
- Cockpit Confessions
- Communication & Etiquette
- Contests & Sweepstakes
- Colleges & Tech Schools
- Food, Drink, Entertainment
- New To Boating
- Travel & Destinations
- Watersports
- Anchors & Anchoring
- Boat Handling
- ← Maintenance
Restoring Teak
Advertisement
There's nothing prettier than teak on a boat, but it requires some upkeep. Here are some tips and products to help keep it looking great.

The natural, unfinished teak on the sailboat above is a beauty. But with brightwork varnished and the deck oiled (above), she sparkles! Here you can see the difference in a teak deck that's been sanded (top) and unsanded (bottom).
Teak maintenance is a love-hate affair for most boat owners. We love the warm, golden glow of a freshly cleaned deck, but not so much the elbow grease required to keep it so. Let's take a look at some cleaning tips that can help bring your tired teak back to life.
The Versatility Of Teak
Due to its resistance to deterioration, rot, and insects, teak is one of the few things onboard that allows a boater to decide the amount of effort they want to spend maintaining it. Many prefer the golden glow and accentuated grain highlighted by properly oiled or varnished teak deck or trim, viewing the additional work required to achieve it as time well spent. Others take the more laid-back approach of letting it attain a natural silver-gray color, safe in the knowledge that less than 1/100 of an inch below that weathered-gray look lies beautiful, oily wood (just be aware that thinner pieces of teak trim can become severely sun-dried and brittle or crack if neglected for too long).

Regardless of your chosen maintenance philosophy, at some point a reason will arise to give your teak a thorough cleaning, be it spring commissioning, selling the boat, or readying the wood for oiling or varnishing. Ironically, cleaning is when teak is most likely to sustain damage due to the use of harsh chemicals and overaggressive or incorrect cleaning methods. Improper cleaning with pressure washers, stiff bristle brushes, or harsh chemicals can remove the soft, lighter-colored grain of the wood, creating a washboard effect. Once that occurs, these ridges (which more readily trap dirt) can only be removed by sanding, which again removes more wood in a vicious cycle of owners loving their teak to death.
Teak-Cleaning Tips
Most teak dies an early death, not from neglect, but from improper cleaning by well-meaning owners. Although you should always follow the manufacturer's recommendations for any cleaner or product being used, here are eight general tips on proper teak care that will serve you well in all situations.
- Use the mildest cleaner possible to get the job done.
- Always wear recommended protective equipment (e.g., rubber gloves, goggles) when handling teak cleaners.
- Protect adjacent areas and finishes while cleaning. Gel teak cleaners have an advantage in this regard, providing you more control during application on horizontal or even vertical surfaces. Teak cleaners can damage anything from gelcoat and paint to anodized aluminum and even chrome fittings. Wet adjacent areas with water prior to cleaning and keep them wet, being sure to rinse all areas thoroughly (especially those being cleaned) as any residue will continue to eat away at whatever surface it remains on.
- When cleaning teak, scrub across the grain of the wood with a 3M Scotch-Brite pad. A soft, polypropylene bristle brush will do in a pinch — just remember to scrub lightly and never with the grain.
- Badly worn teak should be lightly sanded to smooth the wood's surface. While sanding also removes some of the wood, a smooth surface is easier to properly maintain and can increase the life of teak by exposing less wood to the elements and preventing the grain from trapping dirt and airborne contaminants.
- Keep teak wet while cleaning. An overcast or even drizzly day is better than a blazing sunny day, as it helps prevent the area from drying out.
- Use two-part cleaners as a last resort only, and then use sparingly.
- Keep cleaned and/or treated teak covered if possible, to prevent UV light and weather damage.
The Teak Cleaning Enigma: Less Is More
A quick look at any well-stocked chandlery will show there's no shortage of teak cleaners. One-part, two-part, pastes, powders, gels — the list seems endless. But which one to use? Simplify selection by remembering your teak cleaning prime directive is to start with the mildest cleaning product that looks like it has a chance of success, then work your way up (as required) to stronger cleaners that can do the job with as little damage to the wood as possible.
One-part cleaners tend to be less harsh than two-part products, but may require longer dwell times (the time required to work after the product is applied), multiple applications, or simply lack the cleaning power of their two-part brethren, especially when faced with ultra-gnarly teak.
Two-part cleaners should be considered the "nuclear option" of teak cleaning due to the harsh chemicals and toxic nature of most. Sure, they can clean even the nastiest piece of teak, but they do so by removing some of it in the process. They should be used sparingly and only after milder one-part cleaners have been tried. The first part of a two-part cleaner contains the primary cleaning agent, while the second part (depending on the product) may provide additional cleaning power, contain a wood brightener (to lighten and impart a more uniform color), or simply act as a neutralizing agent for the first part.

Powering off the grime on teak decks with a cleaner and brush. Remember: Less is more.
Other factors to consider when selecting a teak cleaner include ease of application, harshness, dwell time, and "greenness" or environmental concerns. For example, products that have to be mixed require more preparation and time than one that can be applied directly from the container. The same is true for a cleaner that requires a 20-minute dwell time verses one a user can start scrubbing on immediately. On the flip side, many users may be perfectly content to wait that extra 20 minutes if the cleaner is milder on both crew and boat (meaning they don't have to remove teak trim due to worries about damage to adjacent gelcoat or painted surfaces), cheaper, or more environmentally friendly.
While teak cleaners are typically used in preparation for varnishing or oiling, most commercially available teak cleaners are simply too harsh for regular daily or weekly cleaning. For routine cleaning you'll find that sudsy ammonia or a solution of water and mild detergent (such as Original Pine-Sol cleaner) will compare well to most teak cleaners while being a lot easier on the wood, surrounding surfaces, and the environment.
On The Shelf
Here's a sample market scan of both one- and two-part cleaners.

Amazon's One-Step Teak Cleaner
Claims to easily remove dirt, rust stains, fish blood, and other sorts of grease and grime from weathered teak. It's billed as an acid-free formula that won't harm fiberglass or damage the teak's soft grain, while enhancing the natural texture of the wood. Application instructions: Wet area to be cleaned with fresh- or saltwater (including adjacent areas that the cleaner may also contact), then scrub or agitate as needed with a soft scrubbing pad. Rinse with water, then repeat if necessary. Safety precautions include wearing protective gloves and washing hands thoroughly after use. The manufacturer recommends following with an application of Amazon's Teak Prep (a brightener) followed by a good oiling with Amazon's Teak Oil. 32 oz., $15.99 | MDRAmazon.com
West Marine One-Step Teak Cleaner & Brightener

Advertised for cleaning lightly soiled teakwood surfaces. For badly stained or weathered teak, West Marine's Heavy Duty Teak Cleaner Kit is recommended. Product literature states that it won't harm wood and that it removes stains, oils, and so on, while restoring teak to its natural color. It also states its intended for use on teak wood only and that it may damage gelcoat, paint, and metal surfaces.
Application instructions: Spray teak with water, then apply cleaner, allowing it to penetrate for 2 to 3 minutes. Scrub the wood with a soft-bristled deck brush, keeping the surface wet while cleaning. Rinse the wood thoroughly with water. Keep all adjacent surfaces wet with water and immediately rinse thoroughly if accidental contact occurs. West Marine recommends following up with its Golden Teak Oil. 32 oz., $22.99 | WestMarine.com
Iosso Teak Cleaner

Comes as a powder (a 16-ounce jar makes 4 gallons of cleaner) that, per product labeling, safely removes dirt, black algae, and mildew stains in one easy step without harsh chemicals. Iosso states that its product emits no harmful vapors; is biodegradable and nontoxic; won't harm fabrics or colors, vinyls, canvas carpeting, metals, paints, fiberglass, or plastic surfaces; and is gentle to skin (although product labeling recommends avoiding prolonged contact). Application instructions: Mix up a batch of cleaner using the provided measuring scoop — one scoop makes a quart, four scoops a gallon, and so on, when combined with water. The instructions state to use a plastic container, mix only what you'll need for the job, and dispose of any unused solution afterward. Thoroughly mix until the powder is completely dissolved (warm water is recommended for best results), then apply the solution on any horizontal or vertical surface to be cleaned. Cool surfaces with water prior to application if hot. Let stand for 10 minutes or longer while keeping the area wet with solution (thoroughly brushing it into the wood) then rinse with water. Extremely weathered wood may require a second application. 16 oz., $15.25 | Iosso.com

Amazon's Quicki II 2-Part Teak Cleaner
Per the manufacturer, this cleaner is environmentally safe (contains no caustics or acids and is non-butyl) and won't harm fiberglass. Part 1 takes care of the deeper stains, grease and grime, while Part 2 follows through with surface cleaning and brightening agents. Each kit includes a teak scrubber for easier teak cleaning. Application instructions: Wet the area to be cleaned, then apply Part 1 full strength and agitate with provided scrubber; let sit for 10 minutes, then rinse. Apply Part 2, agitate for final dirt and grease removal, let set for 15 minutes and rinse thoroughly. Follow-up manufacturer's recommended product is Amazon's Golden Teak Oil. 2 x 32 oz., $33.30 for set | MDRAmazon.com
West Marine Heavy Duty Teak Cleaner Kit

Advertised for cleaning badly stained or weathered teak. Step 1 chemically attacks stained teak, while step 2 neutralizes step 1. Instructions state the product will not harm seam compounds, however, the label also says it may damage gelcoat, paint, and metal surfaces.
Application instructions: The manufacturer recommends wearing rubber gloves and eye protection when using this kit. First, wet the surface to be cleaned as well as the surrounding areas (including hull and deck), then apply Step 1 Teak Cleaner. Spread and agitate lightly with a synthetic deck brush. As the area darkens (in 3 to 5 minutes), scrub lightly. Rinse thoroughly with water, then apply Step 2 and spread evenly with a deck brush. Agitate lightly, then as the deck turns a light golden tone, hose off all surfaces thoroughly (including the hull). 2 quarts, $47.99 | WestMarine.com
Related Articles
The truth about ceramic coatings for boats.
Our editor investigates the marketing claims of consumer-grade ceramic coatings.
Fine-Tune Your Side Scan Fishfinder
Take your side-scanning fishfinder off auto mode, and you’ll be spotting your prey from afar in no time
DIY Boat Foam Decking
Closed-cell foam flooring helps make boating more comfortable. Here’s how to install it on your vessel
Click to explore related articles
Frank Lanier
Contributing Editor, BoatUS Magazine
Capt. Frank Lanier is a SAMS-accredited marine surveyor with over 40 years of experience in the marine and diving industries. He’s an author, public speaker, and multiple award-winning journalist whose articles on boat maintenance, repair, and seamanship appear regularly in numerous marine publications worldwide. Contact him via his YouTube channel “Everything Boats with Capt. Frank Lanier” or at captfklanier.com.
BoatUS Magazine Is A Benefit Of BoatUS Membership
Membership Benefits Include:
Subscription to the print version of BoatUS Magazine
4% back on purchases from West Marine stores or online at WestMarine.com
Discounts on fuel, transient slips, repairs and more at over 1,200 businesses
Deals on cruises, charters, car rentals, hotel stays and more…
All for only $25/year!
We use cookies to enhance your visit to our website and to improve your experience. By continuing to use our website, you’re agreeing to our cookie policy.

The $tingy Sailor
Diy trailerable sailboat restoration and improvement without throwing your budget overboard.

Restore Your Exterior Teak to Better Than New
Is your topside brightwork weathered, worn, and sorely in need of refinishing? If so, this is one project that you’ve probably been putting off but you know it needs to be done. The job isn’t particularly difficult or expensive, it just takes plenty of time to do it right and to get good results. But after it’s done, it can be relatively maintenance free for years to come while looking stunning.
Before I continue, a bit of legal housekeeping. This post contains affiliate links. That means I receive a small commission if you make a purchase using those links. Those commissions help to pay the costs associated with running this site so that it stays free for everyone to enjoy. For a complete explanation of why I’m telling you this and how you can support this blog without paying more, please read my full disclosure .
Refinishing anything is a tedious, messy undertaking to do well whether it’s furniture or a sailboat. But the results are very gratifying when you get to the end. By the way, go over to my interior teak restoration project if that’s on your to-do list.

Who knows what evil lurks beneath your teak?
Begin by removing all the exterior teak trim pieces. That sounds simple and it should be, but it can actually be the hardest part of this project. Hopefully, you’re not so unfortunate that a previous owner used 3M 5200 sealant/adhesive when they last refinished the wood. It does a really good job at being an adhesive! You might need to literally cut the pieces off the boat by working a sharp putty knife under the length of each piece together with a lot of careful pulling, prying, twisting, and patience.
Be aware that parts can be so glued to the fiberglass that they can pull off some of the gel coat with it. For your own sake and the sake of anyone that will ever have to work on your boat, don’t use 5200 on any parts that will ever have to be separated. Use the more forgiving 4200 formula instead if you must. Better yet, use Butyl tape , which makes a waterproof seal, never hardens completely, and makes disassembly much easier.

The next step is to strip off what is left of the old finish. If your brightwork was last finished with varnish, I haven’t found a chemical stripper yet that works any better, faster, cleaner, or greener than a heat gun and a sharp putty knife. Old finish comes off easily to reveal the sun bleached, weathered, and mildewed wood underneath. Use sandpaper to clean off the last bit of finish, damaged wood, and to smooth out deep scratches and chips.

Bleaching or “Is that your teak’s natural color?”
After you get down to solid, useful wood, the coloring might be uneven and some mildew might remain in the wood’s pores. Bleaching will take care of both problems but don’t use laundry bleach.
Teak oil works miracles

Time to varnish, finally
To make it easier to varnish all sides of the pieces at the same time, see my tips on Simple jigs for varnishing parts .
Apply the first coat of varnish thinned with the manufacturer’s recommended thinner by 50%, followed by one coat thinned 25%, one coat thinned 10%, and two coats unthinned. This technique makes the varnish soak into the wood and fills the grain for a smoother finish. Thick varnishes can be tricky to work with unthinned when they are the consistency of molasses. It helps to warm it double boiler-style over a hot plate.
Lightly sand with a maroon Scotch-Brite pad in between each coat except before the last coat. For that one, wait two weeks for the varnish to completely cure before sanding with 220 grit sandpaper and then apply the last coat. Wipe everything with a tack cloth before each coat. For a Catalina 22, it can take all of two pints of varnish for the hand rails, hatch rails, weather board, crib boards, the companionway trim inside and out, and the winch cover panel.
Depending on the weather, it can take weeks for the varnish to cure completely so wait before reinstalling the pieces and don’t take on this project if you plan on using the boat soon after.

The edges of the crib boards wear first and are the places most likely for water to seep in and ruin them. So after the varnish has cured, mask off each edge about 1/4″ on the front and back of each board and brush a coat of slightly thickened epoxy on the edges. This gives them a hard coating that seals them completely and will protect them for many years to come. Just be careful to not build up the thickness so much that the boards don’t fit together anymore.

The fun part
Reattaching the parts is a downhill run. Just reverse the steps you used to remove them. Use Butyl tape at every joint between wood and fiberglass for a watertight seal.
Then stand back and admire a job well done!

Would you like to be notified when I publish more posts like this? Enter your email address below to subscribe to this blog and receive notifications of new posts by email. You will also receive occasional newsletters with exclusive info and deals only for subscribers and the password to the Downloads page. It’s free and you can unsubscribe at any time but almost nobody does!
Share this:
58 thoughts on “ restore your exterior teak to better than new ”.
Where did you get your cylinder lock and lift ring? Is it a marine part of something meant for general outdoor use?
I got the lock from Advantage Marine Supply on eBay but the same thing is available from several online retailers.
Something else to mention: due to the length of the cylinder relative to the thickness of the front of the hatch, the tang on the lock isn’t flush with the inside of the hatch. There’s about a half inch gap that would make it easier to break into the cabin. I made up the difference with a small block of teak epoxied behind where you see the four hasp screws in the pictures. Still, if someone really wanted in, the could force the hatch open. The lock isn’t as stout as the original hasp. You might also consider replacing the tang with a longer and/or stronger one so that it wouldn’t bend as easily.
The main reasons that I installed the cylinder is because we kept hitting our heads on the lock when the hatch is closed but the crib boards were out of the companionway. Maybe you keep your lock on the hatch too but cracked like we did so that it doesn’t get misplaced. This lock also prevents you from accidentally locking the cabin with the keys inside. Been there, done that. You can’t close this lock from the outside without the key, so problem solved. Plus, it just makes for a better looking installation, I think.
Hope that helps!
Ever windward, $tingy
Love the look of that lock, too. I used to keep my lock on the hasp also when not being used, but have since moved it so as to avoid the scars that are possible from banging forehead into it.
One thing I’ll point out about having a lock requiring a key is the obvious potential to lose the key. I solved that issue by installing a lock that uses a 4 digit combination. Never a lost key now.
OK…so I have been “thinking” about (or shoudl I say putting off) doing my teak on my Cat 25. After reading this post last weekend, it motivated me to start mine this weekend. I love the work you did on this and I am hoping mine turns out. I started with the tiller handle and pop top handle to see how difficult this is going to be and I must say it isnt as bad as I had been thinking. I have to wait till the weather clears up a bit to remove all of the other pieces now that I know its fairly easy. Using the heat gun to remove the old finish was the best tip!! Thanks! It makes it so much easier then using chemical or mechanical stripping means. That was the part I was dreading, dealing with the stripping and thats why I was putting it off, but the heat gun made the stuff peel right off with the putty knife. Thanks for the tip!! Great site! Some of the things you have on here are stuff I already have done or on the bucket list for my boat.
I’m glad the tip helped you to get over the hump of procrastination with your teak. I know too well what that’s like.
Now that you know it won’t be a major chore, you should be able to work through it at a pretty good clip. When the oil and/or varnish go on and you see it come alive again, you’ll be anxious to get it finished.
When you get done, leave another comment back here to let us know how it worked out!
Sure will. I already have the oil on the two parts I started with, going to let that dry for few days before proceeding with the varnish
How is the edge treatment holding up? Sounds like a really good idea, the edges are where mine show the most wear. Did you put the epoxy on after the varnish or before? I now have two of my crib boards sanded down and working on the 3rd.
It’s holding up really well so far, Mike. I’m glad I did it. In fact, if anything, the trim channels that they sit in are getting more wear than the boards now. I might give their wearing surfaces a coat or two of unthickened epoxy for good measure. Good luck on your boards!
Stingy, great information and website. I just finished up redoing my teak utilizing your method of support the pieces in a form and on footings allowing all sides to be done at once. Thanks, Richie
Glad to hear this site helped you!
My brother is a career private megayacht captain 100ft plus life-of-the-rich-and-famous kinda yachts. He turned me on to Petite Captains Varnish. Its amazing in that you get a glass like finish with seriously less coats of varnish. On the yachts he does not stop till there is no grain to be felt in the varnish, sand and apply repeat till the surface looks like glass. Captains goes on very thick and flows beautifully with great surface tension. Apply till you get the surface you want then hit it with 600 wet or dry and do the “money coat” an extremely thin whetting of the surface just to gloss the surface. That’s how the pros do it…
I’ve heard others who like Captain’s. I may have to try it on my next project. Thanks!
Stingy: great website, very helpful.
In this article you said: “For the varnish itself, I chose Epifanes Clear Varnish. Every owner who has done this job seems to have their own personal favorite finish. I don’t have one yet, so ask me in a few years if I chose wisely.”
So, may I ask – did you choose wisely?
Hi, Michael
It’s been a few years now and the finish is holding up really well. It still looks new and wet but that’s to be expected since up to now, I’ve kept my boat under cover when it wasn’t sailing. If I had to do it over again tomorrow, I’d pick the same finish.
But any finish is going to look great when it’s that protected. However, we recently moved and starting this year, my boat will be in the water 5-6 months of the year so I’ll be watching to see how it holds up to more exposure to the elements.
Ask me again in a few more years 🙂
Great article. Have all the exterior teak off my Catalina 25, and it’s all sanded. Getting ready for the oxalic treatment. Was wondering if anyone had a resource for the cylinder lock assembly that replaced the original (ugly) hasp setup? Thanks
Here’s a link to it on Amazon .
Wow, just beautiful work.
We have been looking at the teak on our boat for a few years now, but our biggest stumbling block has been the holes where the screws go. Most of the plugs are either lost or cracked, there are multiple diameters (none of which fit exactly) that we need, and I don’t know of a good way to get a plug perfect in height so it will fit and work once the teak is in place again. Any advice?
Hello Gretchen,
Unless you need to replace the screws, you shouldn’t remove the plugs. They are just to hide and protect the screw heads from the elements. Just remove the nuts and washers on the underside and pull the handrails up leaving the screws intact. Refinish the wood and replace in the reverse order.
If you do need to remove a screw for some reason or replace a damaged plug, carefully drill out as much of the plug as you can without enlarging the hole. A little hand carving might be necessary to get it all. Replacement plugs are available from most marine suppliers. Here’s a link to various sizes on Amazon. Glue the replacement plug in place, trim it flush, sand smooth, and finish as usual.
Thanks, I definitely don’t want the extra work of replacing plugs. Unfortunately we’re missing a few already, so I am stuck with at least some of them needing to be replaced. Thank you so much for the advice! Are there any tools better or worse for trimming the replacement down as close as possible without (accidentally) damaging the teak next to it?
If you have woodworking tools or know a woodworker who can help you, use a fine tooth handsaw to trim off the excess plug to within 1/8″ of the handrail. Then use a sharp chisel or utility knife to round over the top of the plug almost flush to the handrail. Use two or three grits of sandpaper starting with the coarsest to sand the plugs smooth before finishing. Teak is very hard so use very sharp tools for the best results. It will also take more sanding than you might expect. But that’s why it’s used on boats, because it’s so durable (and beautiful)!
A Forstner bit is what I use to drill out the plugs. I also use a plug cutter to make my own plugs from some scrap teak I have around. Put a little glue in the hole, tap in the plug, then cut flush with a flush cut hand saw and sand to any curve. You will have to touch up the finish in those areas, but it is actually fairly easy to do.
That’s the right way to do it, Chris, IF you need to get a tool on the screw heads or replace the screws.
Many owners think that they have to do that just to take the handrails on or off for refinishing. In my experience, they come off just fine by removing the nuts from the underside without drilling. That is, so long as the heads are still glued solidly under the original plugs and don’t spin when you try to remove the nuts.
Thanks for your comment! $tingy
Hi, I leave my Catalina 22 out in the elements about six or seven months out of the year. It seems that some people suggest not varnishing wood in that case. I would like to varnish as you have. Do you have a prediction as to whether it will hold up and look nice for years to come? Maybe that’s asking the impossible. 🙂
Going unfinished is the lowest maintenance option but that means your brightwork becomes dullwork and not everybody appreciates it, especially for such beautiful and rare wood as teak. If you finish your teak like I describe in this post, it will last a long time if you maintain it. The varnish has built-in UV inhibitors but you should repair all deep nicks and scratches as soon as possible before moisture gets under the surrounding finish and causes it to blister or peel. When the finish gets worn enough, a fresh topcoat applied with the parts still on the boat may be needed to restore it to like new again. Even with that, you will need to refinish it all again eventually if you keep the boat that long.
Thanks for your question, $tingy
Wonderful! Thanks for giving me a sense of courage to take it on. I’m looking forward to making it look pretty (and keeping it that way with the varnish!) It is amazing how quickly the nice look faded last time I did the teak… looking forward to seeing the beauty last!
Hi, I had been in the coatings industry for decades. I would suggest tenting and adding heat to reduce your stated weeks for individual coats on the wood. While I now live in Florida, we lived in cold country for 20 years where climate control was just part of the job doing coating projects. Makes life more FUN.
Thanks for your great articles. We are newbies with a 1979 Catalina 27 as our boot camp boat. You might want to look at Belzona videos on YouTube. I am retired from sales but willing to help with projects.
Best regards, Jim in Satellite Beach.
Hi there – I really enjoy your website – it is terrific. I looked at your post about bedding down with butyl (sounds like a terrible movie) and I understand the concept when it applies screws and bolts. But with something like the companionway hatch rail do you put a string of butyl tape under the entire length of the rail? Or do you just put small “cheerios” around each of the screws? Thanks kindly for your help, Jon in Nova Scotia
Great question. For the hatch rails and trim, in addition to donuts around the fasteners, I do apply a string of butyl near the edges all around the underside of the pieces to seal them as well. Otherwise, water can get trapped under the wood and work its way under the finish. From there, it can spread and loosen the finish all over the parts. The same can happen from dings and scratches in the exposed finish so it’s a good idea to touch up the finish when you can. Sealing the edges also keeps out dirt and bio matter that can breed mildew and moss.
Hope you’re enjoying a great spring season up there in Nova Scotia and you’re getting out on the water soon if not already! $tingy
I do not see how you were able to get all of your supplies for under $60. Did you steal the Epiphanes =^? 2 qts is +$70. Other than that, this is a pretty good tutorial on how to finish exterior woodwork. I picked up a copy of “Brightwork: The Art of Finishing Wood” a while back.One of the tips she gives on dried out teak is once the wood is cleaned and bleached, wet sand with pure tung oil to create a sawdust paste that will fill in the grain and reinvigorate the oily properties of the teak.
For boats like a C-22, two quarts of varnish would last a lifetime. I used most of one 500 ML can for this project, which can be found for under $30. The oxalic acid crystals were only a few bucks and I already had some teak oil from the Refinish Your Interior Teak to Better Than New project. The hatch lock was the highest cost item but is optional. The rest of the supplies, I already had on hand as well: epoxy, sandpaper, tack cloths, etc. Mostly what you need for this project is plenty of time to do it well.
Good tip on making your own filler paste. Severely neglected teak can be pretty rough and sanding down to solid wood can remove too much material.
Thanks for your comments, $tingy
Your excellent teak story arrived today just a week late as I am just finishing off the job! Today I will applying the 4th coat of varnish on my teak tiller. It had been oiled (many times over) with olive oil and had gone dirty and sticky. Won’t do that again! While oiled teak is my favourite “look” I decided to use varnish this time. Three years on and the grab rails still look fine, so using the same stuff. I have long used oxalic acid as a cleaner/restorer and it came up trumps again with the true colour beaming through after several hard scrubbings and applications. A quick sand with 240 wet and dry. Beautiful colour, so did not oil. Indonesian teak, not Burmese. So far 3 coats of polyurethane marine varnish, and one more to come. Now here’s the thing: you recommend expo to build up the wear edges. But from my experience epoxy fairs very badly in UV. What protection for the epoxy to prevent it discolouring and eventually breaking down? I used epoxy (Bote Cote) on the deck teak blocks that secure the spinnaker pole and it lasted just a year before going opaque and staring to flake off. What epoxy do you use that is UV protected? Thanks for these newsletters – keep ’em coming!
I applied West System epoxy to the edges of my crib boards and have not noticed any UV degradation after 3 years. However, I do not leave my boat outside year round, the edges are not exposed to direct sunlight, they’re blocked by the companionway trim, and I also protect my companionway with this canvas cover when the boat is not in use.
Your environment must be quite different. What might work for you to get the best of both worlds is to apply a good UV protectant varnish over the epoxy instead of epoxy over varnish.
Any suggestions on removing the hatch rails on my 1979 Catalina 22? They seem to be “cemented” in place with very old sealant. I’m trying with a flexible putty knife and a hammer, but it is VERY slow going.
Patience. Sharpening your putty knife may help as might a hair dryer or other form of low heat to soften the sealant. When it comes time to reseal them, use butyl tape and it won’t be nearly as hard the next time.
Thanks! Patience was the key. I also found that putting a bit of mechanical stress for a while (even just leaving a putty knife wedged under the wood for a couple of hours) seemed to help loosen things up. Of course, maybe.the benefit was simply in me taking a break every once in awhile. In any event, I have now successfully removed all the external pieces and ready to start refinishing. Yes, I have a great big roll of butyl tape to use when I get to the re-installation.
I love your site. It has been great inspiration as I take on the refurbishing of our newly acquired 1979 Catalina 22.
- Pingback: Teak Restoration – A Man and His Dinghy
Hi Stingy, My question relates back again to the butyl tape. You suggest application at each joint and edges (for the hatch rails). My butyl tape is 2″ wide and rolled like a cinnamon roll. Do I leave it flat and trim strips? How wide should the strips be? Should I worry about leaks where I join pieces together? Can I apply this technique when resealing my cabin hatches/windows?
Lastly, how is the teak finish holding up on Summer Dance now that she has greater exposure to the elements?
Thanks for all your tips!
Hello, Becky
I assume you meant that your butyl tape is 2″ wide, not 2′ wide, so I edited your original question. Regardless, you don’t want to use it in it’s original width. For tips on how much to use and how to prepare it, see How To Bed Hardware With Butyl Tape . And yes, when you join two strips of butyl tape, knead the ends together to maintain a continuous seal.
Resealing portlites is a more involved process, for which I will be posting a separate article so stay tuned for it.
The brightwork on Summer Dance has held up well for over 5 years now. There are a few small dings from normal use but it won’t need refinishing anytime soon.
Thanks for your questions, $tingy
Re butyl tape: we can get butyl mastic in a caulking tube here (Australia). Makes it reasonably easy to apply, though a bit sticky when fresh. Any reason why this would not work as well as tape?
I can’t think of a reason why it wouldn’t work just as well provided that it cures a bit harder and doesn’t stay so soft that it acts as a lubricant between parts. It would seem to be a good option for use in winter when butyl tape could be harder to work with cold.
Thanks for your comment, $tingy
Thanks $Stingy Yes, it does stiffen up, in fact it goes off in the tube after opening a month or two and becomes stiff.
How are the two exterior trim pieces (holding the crib boards) fastened to the fiberglass? My C25 has original pieces with a couple of large cracks that I’d like to repair or replace. I wonder if they are held in place by sealant and the screws from the interior trim pieces but I can’t tell. Any help?
They are secured with a second set of screws (not the interior trim screws) on the inside of the bulkhead underneath the interior trim. So you get to refinish them all at the same time.
When reinstalling the refinished pieces of teak, do I need to also use sealant (like 4200 or 5200) around the screws if I’m using the Butyl tape you recommended?
Hello, Kate
I use little donuts of butyl tape around screws but you can use another sealant if you want. I don’t recommend using 5200, though. It cures very hard and can make the pieces impossible to remove again in the future.
Re butyl tape, install videos ie stanchions call for applying tape to screw, not turning but tightening nut instead. With handrails, hatch guides etc screws must be turned into the wood. How to best apply tape when reinstalling?
In that case, it’s true. Each situation has it’s own challenges. It’s not critical how you apply the sealant, just that it produces a watertight seal. For the parts you mentioned, I apply a thin (1/8″ or so) bead around the perimeter of the part and around the screw holes, then tighten the screws. I retighten a day or so later after the butyl has had a chance to spread to achieve maximum compression.
Would like to refinish mine, but the previous owner thought staining the teak would be good, they used a brush, they left it that way, they didn’t rub with a rag after. probably have to paint as I doubt sanding will remove stain 😒
Can you try sanding down to bare wood in an inconspicuous spot such as an underside?
Personally I against varnishing teak. I have always had great results with the Oleo stuff (sorry for brain fade can’t remember full name. If you varnish exterior teak it looks beautiful until it doesn’t then you have to strip it all off and start again. With the oil aight sand and an oily wipe over twice a year and it always looks good. If its too weathered a scrub with oxalic acid, then oil and it’s back to beautiful.
Love my sailboats
Removing varnish form old parts that were removed and bleached is something I do not want to do again. I am interested in only regularly cleaning and then oiling the teak. No more varnish finishes. Your thoughts?
I hear you, John. It’s a personal preference. There are a lot better ways to spend time than maintaining brightwork. Thankfully, there good products available to meet everyone’s choice.
What products might they be? I am currently trying oxalic acid diluted 4:1. My teak trim is 34 years old and I cannot get the dark streaks out.
By “dark streaks,” do you mean black mildew or natural wood grain? For mildew streaks, oxalic acid is your best bet but you might be diluting it too much. Are you buying it in liquid or crystal form? If liquid, what is the concentration in the bottle? I make mine from as much crystals as will dissolve in warm water, then applied full strength and given a few minutes to work before neutralizing. Even then, it can take multiple applications to achieve the results you’re looking for. It can also take sanding to get out deeply embedded mildew.
Thank you for your time spent here.
I had some reasonable results. I was being safety conscious with the 6:1 and agree I’ll get to 4:1 next cleanup. I’m considering refinishing the companionway panels and using a sealer, not varnish.
Can you recommend a sealer that will keep the product looking good longer than the handrails, companionway guide rail, and window eyebrows that I don’t mind keeping after in its current well-oiled format?
Safe Sailing
I don’t have any personal experience with it, but some folks like the look and ease of maintenance of Sikkens Cetol Marine Wood Finish.
It is preferable to use the two-part cleaner if you have neglected the teak wood for a long period.
Leave a comment Cancel reply
This site uses Akismet to reduce spam. Learn how your comment data is processed .

- Already have a WordPress.com account? Log in now.
- Subscribe Subscribed
- Copy shortlink
- Report this content
- View post in Reader
- Manage subscriptions
- Collapse this bar
Better Sailing

How to Restore Teak on a Boat
There is nothing that can make or break the look of a sailboat more than the look of the exterior teak. But teak isn’t a maintenance-free boat surface that can be ignored or neglected for a long time. Though teak doesn’t rot, it can crook, check or look dull if proper care is not provided. Keep in mind that this article is not about deck restoration, so, we will not going to get into applying new Sikaflex on your deck, etc.
Teak is amazingly flexible and can be made new again even after a lot of rough use. Teak with grey weathering rarely extends far below the surface of the wood. Instead of tedious sanding and scrapping to restore the weathered surface, a standard chemical cleaning is enough to bring back the teak from its worst condition to nearly its original appearance. Chemical cleaners can clean almost the worst off weathered teak.
Though, chemical cleaning may be tough on wood. Many chemical cleaners depend upon an acid or a caustic to bleach and clean the wood’s surface. But sometimes these chemical cleaners wear away the surface gradually. To achieve the best results, you should never allow your teak to get to that condition where you have to take these drastic measures. However, if things happened and there is a need for extreme cleaning, make an effort to keep it clean moving forward.
Keep in mind that this article we will not going to get into applying new Sikaflex on your deck, etc. The article is coming though and will link it here as soon as it’s available.
If the teak of your boat got dark brown because of age or got weathered grey due to negligence, then the first thing necessary is to clean it thoroughly. The severity of the discoloration of your teak will tell the restoration method required. Since cleaners contain caustic and acids that are tough on wood, you have to use a mild cleaner as less as possible to do the job. The value of a mild scrub using a soft cleaner is that it’s gentle for the teak. As it is more probable to have soft cleaners in your boat, always try this method before applying drastic measures.
The mildest cleaner for teak could be a common purpose domestic powdered soap. A concentrated powdered cleaner with vigorous scrubbing using a soft brush will clean the teak, which is just dirty. Scrub it as lightly as you can and also keep in mind that you have to scrub across the grain. Every time the teak is scrubbed, softer wood is removed, which eventually causes a rough surface that elevates the grain. Using a scrubbing brush regularly to scrub the grain, makes it weak and rough.
First of all, try to wet down the teak with fresh water, then clean it with a detergent solution. After that rinse it with water, then leave it to get dry for some time. If the teak’s wood gets clean, even a light tan, then you are in luck. Otherwise, you will need to use a powerful cleaner.
Pro-Tip: You can also use the same washing machine power that you use to clean your clothes. I am talking about the powered detergents with the small grains in them. Those will actually help scrub the wood better because the granules will get into the teak. The best way is to sprinkle it directly on the teak instead of using a bucket and then doing it. However, you are looking for better results the following options could be better for you.
One-Part Cleaners
The next step is to use “one-part cleaners” made explicitly for teak. It can be liquid or powdered. Most cleaners consist of a mild and abrasive acid-like oxalic acid or phosphoric acid. These acids are more efficient in lightening the surface of the wood than a simple detergent. Most of the household cleaners have oxalic acid. You should take precautions while using these cleaners, which contain acids.
Even a badly weathered wood of teak can be cleaned using “one-part cleaners”. After drying the wood, it should come out as light tan. After cleaning one time, if some areas remain grey, repeat cleaning will do the trick. Still, if the wood of the teak is discolored or mottled, then you have to use “Two-part cleaners”.
I recommend this teak wood cleaner from Star Bright , it is soft on the teak but gets the job done. Make sure to get a Scrub Pad and a Stainless Teak Scrub too so you can get the best result as easy as possible. Here is a video on how to do it properly:
Two-Part Cleaners
These cleaners are more powerful, but they are hard on the teak. They are potent acids and caustics that can do a fantastic job of brightening and cleaning the teak. But it should be handled with care to avoid harm to adjoining surfaces. Also, surrounding surfaces, whether varnish or paint, should not be tainted by these cleaners. Continuous flushing of surrounding surfaces with fresh water among cleaning is usually sufficient, but covering off freshly varnished or painted surfaces will be more efficient.
There are slight differences in the guidelines for different “Two-part cleaners”, but the common principles are described below:
- Wet down the teak
- Apply “one-part cleaner”, dispersing and gently scrubbing with a soft brush
- When the surface of the teak is a muddy brown, uniform wet, apply “Two-part cleaner”, dispersing with clean stiffed brush
- Apply and disperse the acid required to turn teak into a uniform tan
- Wash it off thoroughly and then let it dry completely
Most commonly, the “two-part cleaner” is used twice as the first to obtain a uniform bright color. So it would be an excellent idea to buy an extra bottle of acid in case it’s needed. Also do not wash off the brown muddy surface of teak, unless the directives require it, after treating it with caustic. Furthermore, neutralizing the acid will reduce the problems.
This is the best 2-Part Cleaner made from TotalBoat and below is a video on how to use it. For large surface areas you might also want to get a get a large deck brash with a handle just to make the job easier.
Preparing for Finishing
A recently cleaned teak is a pleasure to witness, but the teak won’t remain fresh, light, and clean for a long time if proper finish is not applied. The teak’s surface will start to oxidize as soon as it dries. The earlier you complete the treatment after scrubbing, the better.
Teak consists of grain that differs in stiffness, even in the same portion of the wood. Cleaning it with detergent may erode the softer parts of the teak’s grain, leaving ranges of firmer grain. The abnormality of such surface merely increases the speed at which the teak goes dull again.
If the surface of the teak that you have cleaned is plywood, there is a good chance that thorough polishing the teak, the surface may go right off from side to side, exposing the coating of the veneer, effectively ruining the piece. On the usual fiberglass boat, plywood or veneered components are the companionway hatch tops, drop boards, and occasionally cockpit soles and seats. Before polishing any part, inspect them cautiously to understand whether they are veneer or solid lumber.
Polish the uneven grain of severely weathered teak once it is clean.
Decks are typically solid lumber, so they can create problems. If the flooring is less than half inch dense, and has beavered fastenings, polishing the grain edges will sand away sufficient solid to sand from side to side or release the bungs, revealing the fastenings. Even if the grain of teak is on fixed teak surfaces, you will be better off living with a clean uneven surface instead of opening the “Pandora’s Box” trying to make a perfectly flat surface.
On other hard teak objects such as toerails, dorade boxes, and handrails, thorough scraping of the washed surface, before applying it with sealer may produce an attractive surface. Don’t attempt to refurbish grey teak and badly weathered teak by scraping before cleaning it as I described above. There is a chance that you may quickly learn that discouraging quantity of scraping is necessary, and you will use chemical cleaners. Polishing both before and after the treatment is just a waste of effort, and may eradicate more wood. Teak with noticeable surface abnormalities would definitely take an eternity to scrap out to obtain an even surface. While cleaning with chemicals will swiftly lighten up even the inmost grain or gouges defects. Also, wait till the scrubbed teak is completely dry before polishing or applying teak covering.
Polishing scrubbed teak isn’t always needed. Mainly polishing is necessary if the teak’s surface needs to be preserved with oil covering instead of using a gloss polish like varnish. Granted, flawlessly smooth teak’s surface is more uniform in color. From a merely practical point of view, irregularities are insignificant except in the case of simplified scrubbing. Unless you plan to put the effort needed to preserve your teak’s surface between main cleanings, polishing the teak’s surface smooth is just a waste of your time. The chemical cleaning may recur the grain of the teak raising cycle, needing another rubbing.
If you are keen to keep your teak up, a good scraping will improve the wood’s form. The safest instrument for general smoothing is the high-speed sander like the “Makita XOB01Z” or any other small sander. I just like this one because it’s cordless, portable, and durable. It is also made by Makita, and I have great experiences with the brand. Inexpensive, slow-speed, and heavy sanders must be sidestepped. They leave revealing twirl marks on the teak’s surface that are emphasized by the finish. Also never use the sander on the surface of the teak to be scrapped bright.
The same is the case for a belt sander. A belt sander is maybe the most effective tool for leveling flat and large surfaces. But can also do some painful and permanent damage if the person using this tool is inexperienced. For hatches and decks of hard lumber, belt sander may be the solution, only if you’re comprehensively experienced with this equipment.
When doing power sanding, remember to cover surrounding areas of gelcoat. Just lightly touching the refined gelcoat surface with the sander will damage it. This same instruction applies to manual sanding. Remove the masking tape instantly after the completion of sanding. Even just leaving tape overnight on the exterior surface may make it difficult for you to remove.
The adhesive residue could be removed with the mild solvent like alcohol and gentle rubbing with a rough cloth. Many teak coverings are easily put with polyfoam brush.
Remove dirt from the surface with a vacuum cleaner, after sanding. If electricity isn’t available, just sweep thoroughly with a large paintbrush or dusting brush. Obviously, you do not need to sacrifice your finest paintbrush. The cheapest stiffen brush will do just fine.
Applying Finish
The last step in restoring the surface of teak is the application of a sealer or coating to preserve for a long time the look of freshly installed wood. Your preference should be a covering that doesn’t blacken the wood. A good idea would be to look nearby boats whose teak looks good to you, then ask the owners about the products which they use.
No teak polish lasts for very long. To get the best results, monthly use of coating is needed, with good cleaning before putting on a fresh coat. You’re kidding yourself if you think a once-a-year treatment will keep your teak looking good. Don’t try to use domestic type equipment oils for teak. They may not stand against the weather.
Whatever teak covering you utilize, be wary of smearing it. Splattered teak covering will not look good when it’s put on fiberglass. However, it unavoidably blackens with time, leaving marks that look as ugly as varnish marks, and are hard to eradicate. Clean up these spills and overruns straightaway with any rag dunked in spirits like alcohol unless the manufacturer indicates an alternative solvent. Covering tape isn’t particularly efficient in defending surfaces from teak oil or varnish, as the thickness of most coverings is so thin that they just drain under the edge of the tape. The solution to this problem is careful use and thorough cleaning.
Depending on the look that you want to give to your boat’s teak you can get some standard teak oil from Star Bright for a matte look or if you want to go for a high-gloss varnish you can get this product made from TotalBoat .
Also, to avoid splatter and oil marks on the teak, the best way to apply the finish is with a foam brush . They are cheap and give the best result with lowest effort.
Maintaining
Your work is not done when the final coat of finish is applied. Teak requires constant attention to make it look good at all times. When a boat is used in saltwater, repeated wash downs with freshwater will definitely extend the lifespan of the covering. But, constant interaction with saltwater will likely decrease it. Highly traffic places like the teak cockpit will need the most care of all. Although they are easy to brush and retreat, sanding isn’t always desirable.
How to Restore Teak on a Boat – Conclusion
I know it seems like a lot of work. That clarifies why the exterior teak surface on many boats looks so dirty. It takes less effort than preserving a varnished teak surface. If you think you need varnished teak, first of all, try to maintain a freshly oiled surface just for a year and revisit the idea then.
Few things look better on a boat, mostly a white fiberglass sailboat than a well preserved exterior teak. A person who neglects teak wood may also be the same person who hardly replaces engine oil, and who hardly troubles himself to place the sail protections after a sail when he assumes he is going to sail again tomorrow. So, if you are looking for a sailboat to buy, remember that a clean and neat exterior probably means a well-maintained boat overall.

Peter is the editor of Better Sailing. He has sailed for countless hours and has maintained his own boats and sailboats for years. After years of trial and error, he decided to start this website to share the knowledge.
Related Posts

Best Non Skid Boat Deck Paints

How to Remove Pinstripes From Your Boat

Common Sailboat Problems and How to Fix Them

Common Outboard Marine Engine Issues and How to Fix Them
- Buyer's Guide
- Destinations
- Maintenance
- Sailing Info
Hit enter to search or ESC to close.

- Boat Accessories
- Where to Buy
Special until September30th: 20% off Git-Rot (all sizes). Use Code SEPT24 at checkout. *restrictions apply
Free ground shipping in the Continental US for any orders over $150!
A Teak Restoration How-To...
A teak restoration how-to.

There’s nothing more beautiful than a boat with well maintained teak decking. It not only looks amazing, but it helps hold up to the harsh marine environment if it has been properly treated. So, as beautiful as it is, it does require maintenance. If you are familiar with teak decking, you already know you will need to perform needed restoration work from time to time. In order to get great results from your teak wood maintenance and continue to enjoy its beauty in the future, consider these tips for teak restoration.

When Is It Time To Restore Your Teak?
Restoring teak is necessary, not just continue to make it look nice, but to also to protect your wood. You need to know when the time is right. Restoring teak does take quite a bit of time and effort, so you don’t want to go through all of that when it’s not needed. The first way to tell when it’s time is observing the color of the wood. If your teak has turned to a shade of grey or looks brittle, then it’s time to start restoring. Because it is a little more than just slapping some protectant on the wood, it’s important to have a plan before you jump into action.

Jumping in and being too aggressive is probably not the best idea. It’s also important to be careful with what products you choose. Harsh chemicals are not the way to start. You can actually damage your teak if you jump right to cleaners with a lot of abrasive chemicals, and those harsh chemicals are usually not even needed. We suggest you start with our Teak Brite Powder Cleaner. It can deliver amazing results without damaging the wood grain. After using the Teak Brite Powder Cleaner it is important to make sure you let the wood dry completely before continuing. If you find this is not a strong enough cleaner, you may need to move on to a harsher cleaner.

Scrub Scrub
Using the right tool while cleaning your teak is important. Our Life Scrub-All is a heavy-duty continuous filament marine stainless-steel scrubber which is perfect for teak and other hard wood. It has a lifetime guarantee not to corrode, wear out or disintegrate. Be sure to get a scrubber designed specifically for this job will avoid damaging the teak.
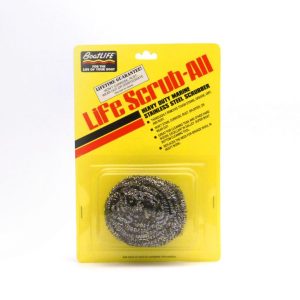
Protect Your Teak
Restoring your teak does require quite a bit of effort. Don’t waste all of that hard work by not sealing up the teak after you are done. The critical last step of your restoration should be applying a teak oil and sealer. If you skip this step, your great looking restored teak surface will return to its weathered look. Be sure your teak is completely dry before you apply the oil and sealer. We suggest using BoatLife’s Teak Oil & Sealer. Our oil is the most advanced teak oil and sealer available. It delivers long lasting protection even in tropical climates. You might have to wait an extra day to get back out on the water, but the oil coat will not soak in properly if the wood isn’t dry, so be patient!
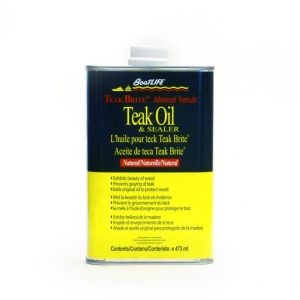
For more boating tips and our full line of products, be sure to visit our website at www.boatlife.com .
Share this:
- Click to share on Twitter (Opens in new window)
- Click to share on Facebook (Opens in new window)
Featured Products
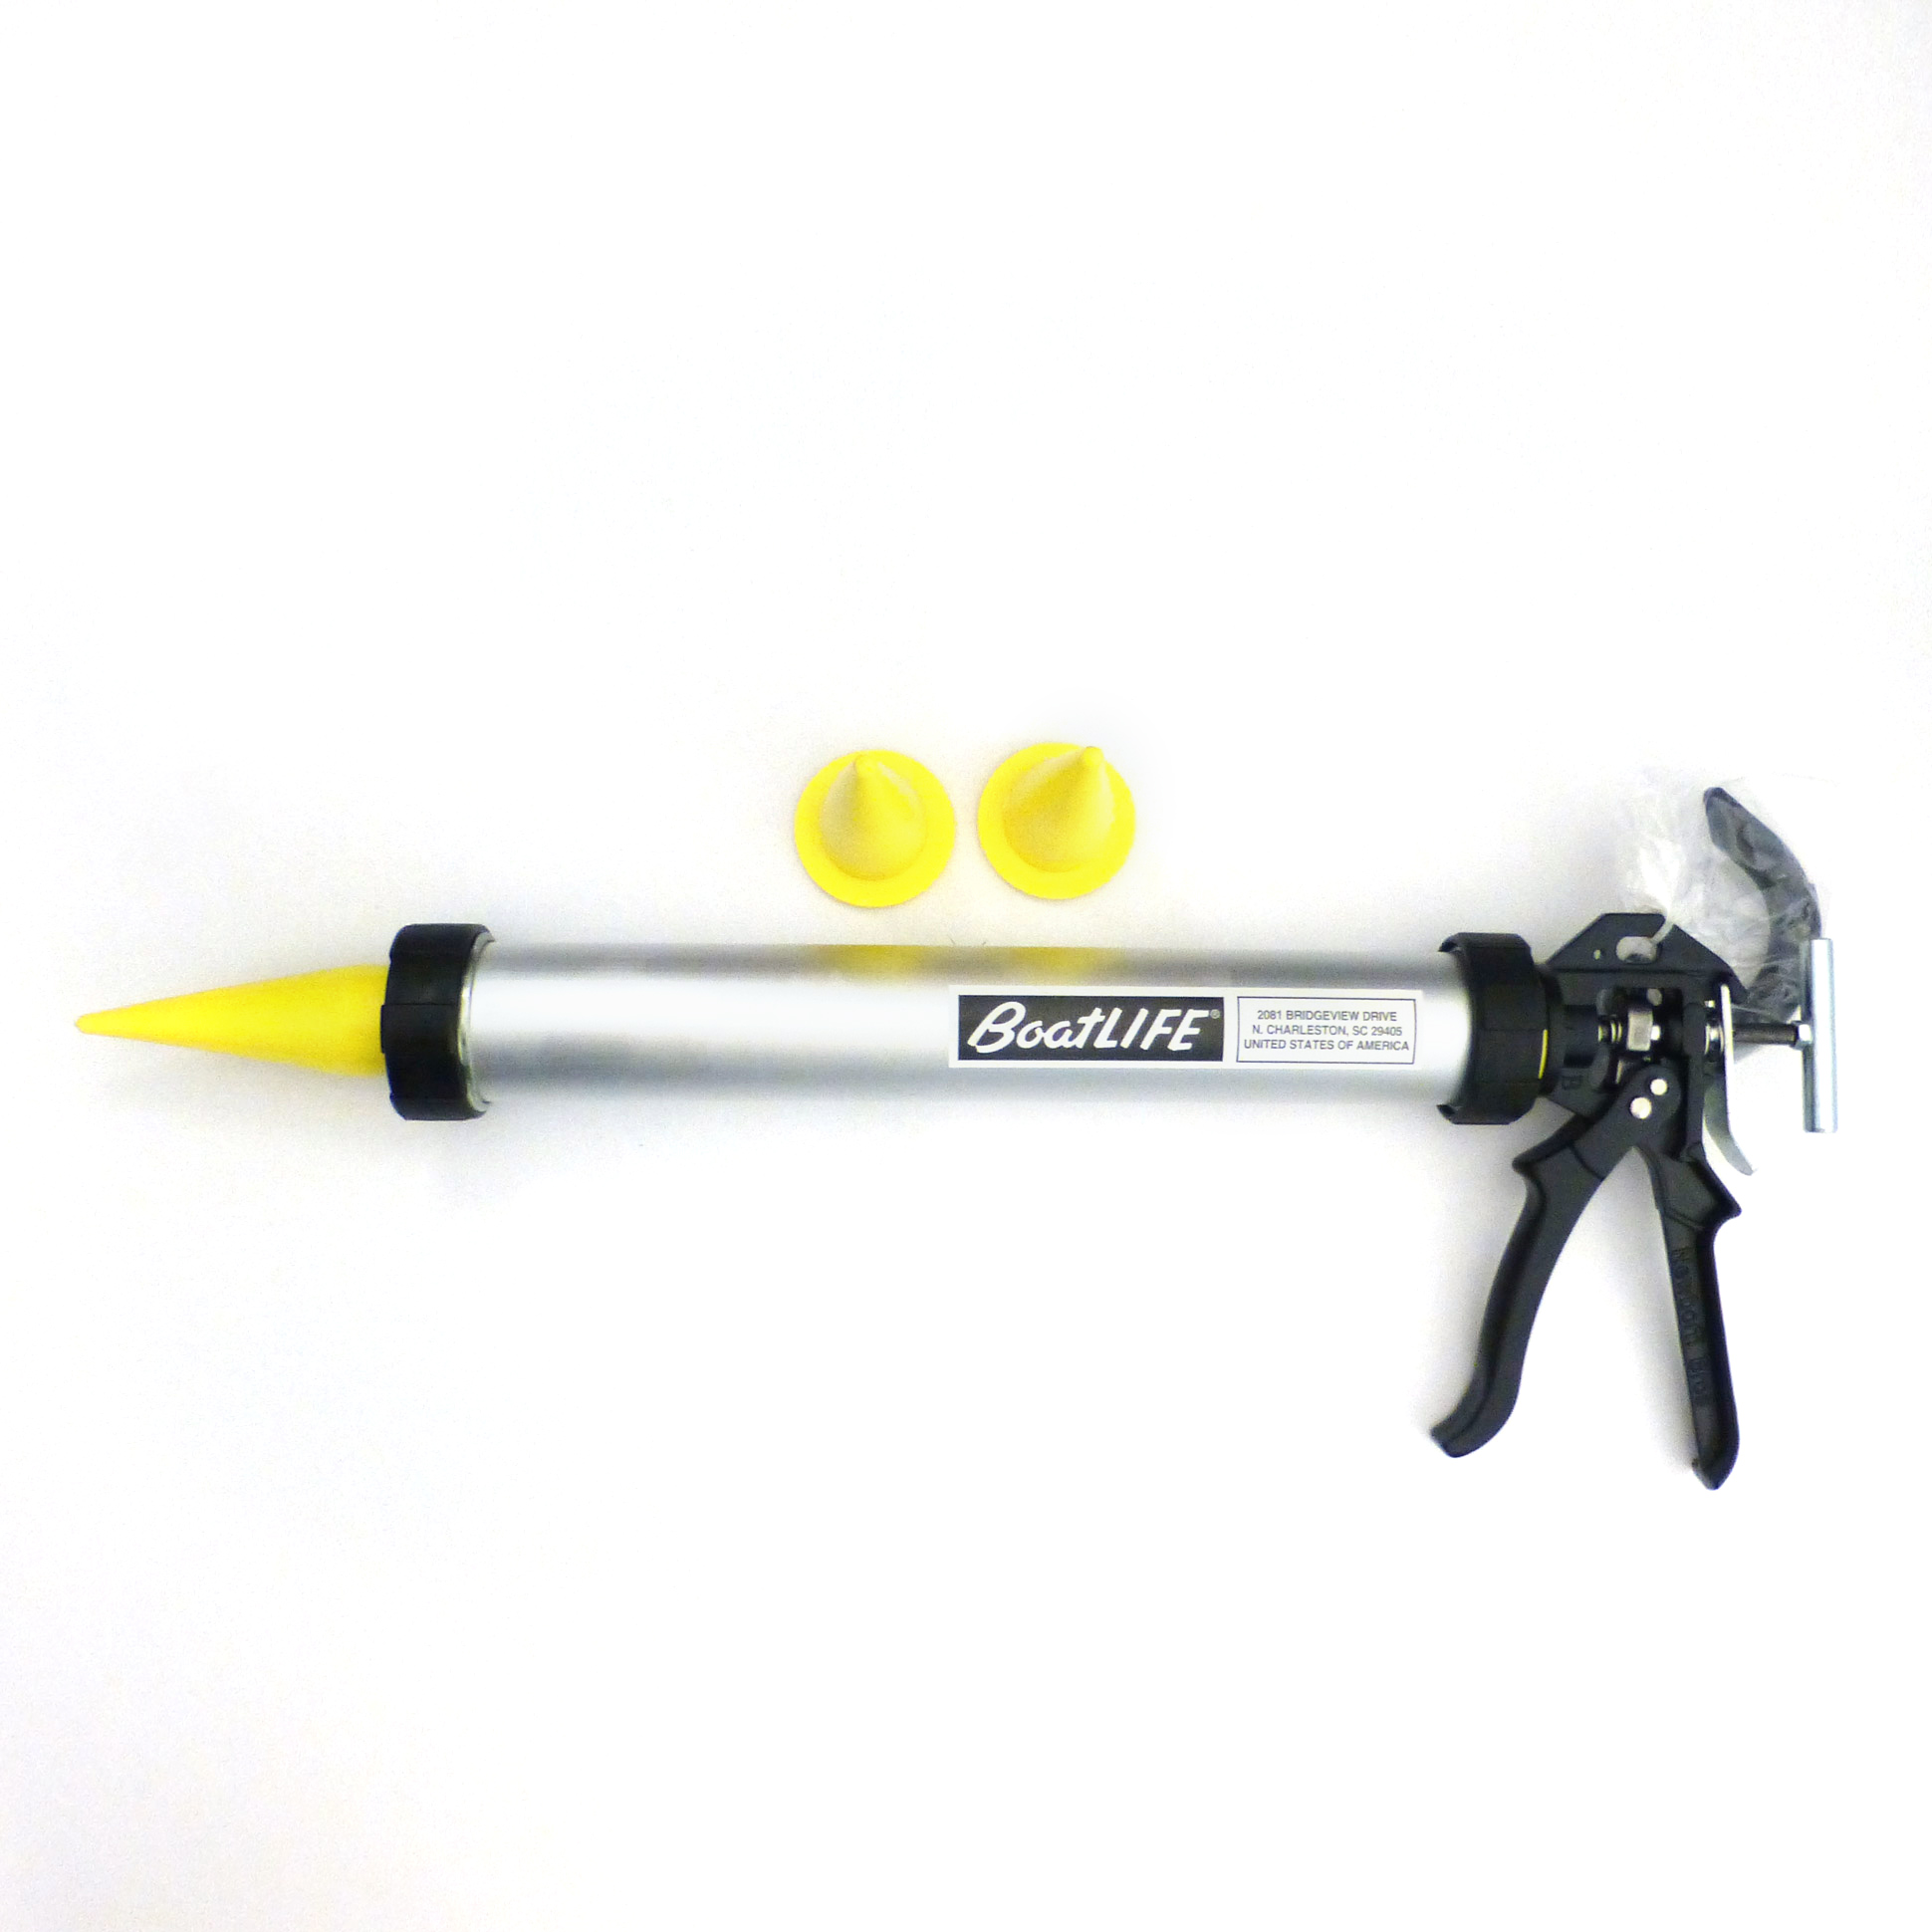
Liquid LifeSeal® Sealant 5.2 fl. oz. Clear

Stainless Steel Cleaner 16 fl. oz.
Related blogs, replacing fiberglass flooring on your boat.
Here at BoatLIFE, we’ve been in business over 65 years perfecting the art of DIY boat maintenance, boat restoration, and […]
BoatLIFE Partners with Lowcountry Maritime School
BoatLIFE is pleased to announce a unique partnership with Lowcountry Maritime School, one of Charleston, South Carolina’s premier maritime education […]
What to know about Olympic Sailing
The Paris Olympics are in full swing and there’s no better time than the present to support Team USA! Here […]
All products proudly made in the usa

- Marine Teak Restoration
Coastal Yacht Detailing is your go-to destination for premium marine teak restoration services. If you’re a proud boat owner who appreciates the classic elegance of teak, our team of skilled professionals are here to help you restore its natural beauty and ensure it stands the test of time. With our meticulous attention to detail and passion for perfection, we bring back the luster of your marine teak, making it a focal point of envy on the waters.
Why Choose Us?
At Coastal Yacht Detailing, we understand that marine teak is not just a material; it’s a statement of style and sophistication. We take pride in offering you the following key benefits when you entrust us with your teak restoration:
1. Expertise that Matters: With years of experience and a deep understanding of marine teak, our team possesses the knowledge and expertise to handle teak restoration projects of all sizes and complexities. Whether your boat needs a complete teak deck refurbishment or spot repairs, we have you covered.
2. Revitalizing Your Teak’s Natural Beauty: Over time, marine teak can become weathered, dull, and lose its characteristic golden hue. Our restoration services involve thorough cleaning, sanding, and refinishing, revealing the natural warmth and rich tones that make teak a timeless choice for boat decking.
3. Preservation for the Long Haul: We believe in sustainable restoration practices. Our eco-friendly approach ensures that we use products and techniques that not only beautify your teak but also protect it from the harsh marine environment, extending its life for years to come.
4. Tailored Solutions for Your Needs: Every boat and teak surface is unique, and we treat them as such. Our team works closely with you to understand your requirements and deliver customized solutions that align with your vision for your boat’s teak.
Our Marine Teak Restoration Process:
At MarineTeak Restore, we follow a comprehensive and time-tested restoration process, ensuring exceptional results every time:
1. Inspection and Evaluation: Our experts begin by carefully examining the condition of your marine teak. This step allows us to identify areas that require attention and formulate a tailored restoration plan.
2. Cleaning and Preparation: We use specialized teak cleaning agents and tools to remove dirt, grime, and old finishes. This prepares the teak surface for the next steps in the restoration process.
3. Sanding and Refinishing: Our skilled craftsmen meticulously sand the teak to reveal fresh wood, eliminating scratches and imperfections. Once the surface is smooth, we apply the finest teak oils or finishes to enhance its natural beauty and provide long-lasting protection.
4. Final Inspection: Before we consider the restoration complete, we conduct a thorough final inspection to ensure that every inch of your teak is restored to perfection.
5. Maintenance Tips: We provide you with valuable maintenance tips and guidance to preserve the beauty of your teak and keep it looking its best for years to come.
Bring Your Teak Back to Life – Contact Us Today!
Don’t let your boat’s teak lose its charm. Trust the marine teak restoration experts at Coastal Yacht Detailing to breathe new life into your teak surfaces. Our dedication to quality craftsmanship and customer satisfaction sets us apart, making us the preferred choice for boat owners who demand excellence. Contact us today to schedule a consultation and discover how we can transform your marine teak into a stunning centerpiece on your boat. Let’s embark on a journey to preserve the timeless allure of teak together!
Request A Free Quote Today!
- 2656 East Harbor Road Port Clinton, Ohio 43452
- 419-967-3285
Marine Services
- Auto/RV Services
- Heated Storage
- Marine Ceramic Coatings
- Marine Detailing
- Marine Electronics
- Marine Foam Flooring
- Marine Fiberglass
- Marine Mechanical Services
- Marine Paint/Gelcoat Correction
- Marine Paint Protection Film
- Marine Shrink Wrapping
- Marine Window Tint
- Marine Boat Sales
Auto Services
- Auto/RV Ceramic Coatings
- Auto/RV Paint Protection Film
- Auto/RV Window Tinting
- Privacy Policy
- Terms & Conditions
- Cookie Policy
- Frequently Asked Questions
© 2024 Coastal Yacht Detailing | All Rights Reserved | Privacy Policy
- Recent Threads
Welcome Guest. Please Login or Register .
- Jeanneau Owners Forum
- General Jeanneau Topics
Teak Restoration and Treatment
- Welcome and Introductions
- Use of Forum
- Equipment & Commissioning
- Performance Tips
- Destinations
- Ambassadors
- SO469/479 electrical, inc a/c & refrigeration
- SO469/479 bilge issues
- Sun Odyssey 43DS
- NC and Merry Fisher 695 795 855 895 and 1095
- Video Favourites
- For Sale and Wanted
- Recommended Suppliers
- Discounts and Promotions
- Previous Thread
- Next Thread
- Please make a selection first
- « Prev
- Next »
How to restore a classic sailboatRestoring a classic sailboat can be a fulfilling and rewarding process, allowing you to create a personalized vessel for exploring the open sea with your family. How to Restore a Classic SailboatRestoring a classic sailboat is a labor of love that can bring immense satisfaction and pride to those who embark on this journey. It’s a chance to breathe new life into a vessel that has seen better days, and to create a unique and personalized space for you and your family to enjoy the open sea. In this article, we’ll guide you through the process of restoring a classic sailboat, from finding the right boat to the final touches that make it truly your own. Table of ContentsFinding the right sailboat, assessing the condition, creating a restoration plan, hull and deck repairs, interior restoration, rigging and sails, electrical and plumbing systems, engine and propulsion, final touches. The first step in restoring a classic sailboat is finding the right boat. This can be a challenging process, as there are many factors to consider, such as the size, age, and condition of the boat, as well as your budget and personal preferences. When searching for a sailboat, consider the following:
Once you’ve found a sailboat that meets your criteria, it’s time to assess its condition in more detail. This will help you determine the extent of the restoration work required and whether the project is feasible for your budget and skill level. Consider hiring a marine surveyor to conduct a thorough inspection of the boat. They can provide valuable insights into the condition of the hull, deck, rigging, sails, and other components, as well as identify any potential safety issues or structural problems. Take note of any areas that require immediate attention, such as leaks, cracks, or signs of rot. These issues should be addressed before any cosmetic work is done, as they can compromise the integrity of the boat and lead to more serious problems down the line. With a clear understanding of the boat’s condition, you can now create a restoration plan. This should outline the work that needs to be done, the order in which it should be completed, and an estimated timeline and budget for the project. Start by prioritizing the most critical repairs, such as fixing leaks or addressing structural issues. Then, move on to less urgent tasks, such as cosmetic improvements and upgrades. Be realistic about your abilities and the amount of time you can dedicate to the project. Restoring a sailboat can be a time-consuming and labor-intensive process, so it’s important to have a clear understanding of what you’re getting into before you begin. The hull and deck are the foundation of your sailboat, and any issues with these components should be addressed as soon as possible. Common problems include cracks, blisters, and signs of rot or corrosion. To repair cracks or holes in the hull or deck, you’ll need to clean the area thoroughly, remove any damaged material, and fill the void with an appropriate filler or epoxy. Once the repair has cured, sand the area smooth and apply a protective coating, such as paint or gelcoat. For more extensive repairs, such as replacing large sections of the hull or deck, it may be necessary to consult with a professional boatyard or shipwright. They can provide guidance on the best materials and techniques for your specific boat and ensure that the repairs are done correctly. Restoring the interior of your sailboat can be a rewarding process, as it allows you to create a comfortable and personalized space for you and your family. Start by assessing the condition of the interior, including the cabinetry, upholstery, and flooring. If the cabinetry is in good condition, you may be able to simply refinish or paint the surfaces to give them a fresh look. If the cabinets are damaged or outdated, consider replacing them with new, custom-built units that meet your needs and preferences. Upholstery can be cleaned or replaced, depending on its condition and your personal taste. New cushions, curtains, and other soft furnishings can make a big difference in the overall appearance and comfort of the interior. Flooring options for sailboats include marine-grade carpet, vinyl, or teak. Choose a material that is durable, easy to clean, and complements the overall aesthetic of the boat. The rigging and sails are essential components of your sailboat, and their condition will have a significant impact on the boat’s performance and safety. Inspect the rigging for signs of wear or damage, such as frayed lines, corroded fittings, or bent or cracked hardware. Replace any components that are in poor condition or no longer meet safety standards. Sails should be inspected for tears, fraying, or signs of UV damage. Small repairs can often be made with sail tape or by sewing, but larger issues may require professional repair or replacement. Consider upgrading to modern sail materials and designs for improved performance and durability. The electrical and plumbing systems on a classic sailboat may require updating or replacement to meet modern standards and ensure safety and reliability. Inspect the wiring, switches, and electrical components for signs of wear or damage, and replace any outdated or faulty parts. Plumbing systems should be checked for leaks, corrosion, or other issues. Replace any damaged hoses, fittings, or fixtures, and consider upgrading to modern materials and designs for improved performance and ease of maintenance. The engine and propulsion system are critical to the performance and safety of your sailboat. Inspect the engine for signs of wear or damage, and perform any necessary maintenance or repairs. This may include changing the oil and filters, replacing belts or hoses, or overhauling the entire engine. The propeller and shaft should also be inspected for signs of wear or damage, and any issues should be addressed promptly. Consider upgrading to a modern, efficient propulsion system for improved performance and fuel efficiency. With the major restoration work complete, it’s time to add the final touches that make your sailboat truly your own. This may include installing new electronics and navigation equipment, adding custom artwork or graphics, or outfitting the boat with personalized accessories and gear. Take the time to celebrate your hard work and enjoy the fruits of your labor. Your restored classic sailboat is now ready for new adventures and memories with your family. Restoring a classic sailboat is a challenging but rewarding endeavor that can provide you and your family with a unique and personalized vessel for exploring the open sea. By carefully assessing the condition of the boat, creating a detailed restoration plan, and tackling the project one step at a time, you can breathe new life into a once-neglected boat and create a lasting legacy for future generations. How to Articles | Bottom Paint StoreLearn more about boat paint applications and marine supplies.  How to Clean, Restore, and Seal Teak Wood on Your Boat Restoring your weathered teak wood is an easy 3 step process using the JustTeak™ Teak Restoration Kits . Learn how to clean, brighten, and seal your teak or other wood. This simple teak restoration process can be used on an teak wood including teak furniture and teak decking.  1. Hose down entire areas thoroughly with fresh water. Ensure the teak does not dry during the cleaning process. 2. Applying the JustTeak™ Teak Cleaner with a soft polypropylene cleaning pad, gently scrub the product across the grain of the teak. The teak will tum dark brown and the cleaning pad will fill with dirt. 4. Apply to one area at a time then immediately rinse down entire area with water to remove the cleaner. Repeat if necessary. Step 2. (Part 2) Using JustTeak ™ Teak Brightener on Your Teak Deck  1. Following the application of Part 1: JustTeak™ Teak Cleaner . 2. Hose down entire area with water. 3. Ensure the teak does not dry during the cleaning process. 4. Apply JustTeak™ Teak Brightener with a soft polypropylene cleaning pad, gently scrubbing across the grain of the teak. The teak will immediate lighten. 5. Apply to one area at a time then immediately rinse down entire area with water to remove the Teak Brightener. Repeat if necessary. Step 3. Application of JustTeak ™ Teak Sealer  1. For best results apply in temperatures above 10°C (50°F) on a sunny, low humidity day, ensuring the teak is dry. Shake vigorously prior to use. This product must be shaken periodically whilst using to ensure even colouring. Make sure the surface is completely dry prior to application. 2. Apply the JustTeak™ Teak Oil Sealer by either brush, pad applicator or rag. Take note to apply sealer along the length of the board to ensure even coating and avoid line marks. 3. Apply generously. Allow to dry, soak up any areas that may have not absorbed the sealer. When touch dry, apply 1-2 subsequent coats until the teak stops absorbing the sealer. LOOKING AFTER YOUR SEALED TEAK Over time the sealer will start to lose its lustre and water beading capability. A fresh coat of JustTeak : Teak Sealer should be applied to restore the finish. For best results remove the Teak Sealer with JustTeak Cleaner and Brightener and re-apply. Applying teak oil is a simple and effective way to maintain the beauty and longevity of your boat’s teak wood. Just follow these simple steps and you can ensure that your teak wood surfaces remain protected, shiny, and smooth. Regular maintenance will prevent the wood from drying out, fading, or cracking, and keep your boat looking its best for years to come. So, go ahead and try it out – your teak wood will thank you! The the best value, choose from our Teak Restorations Kits that include the Teak Cleaner, Teak Brightener, and Teak Sealer for the best Savings! Ridetheducks.com is reader-supported. When you buy through links on our site, we may earn an affiliate commission. Learn more How to Restore Teak Wood on a Boat Teak wood is a popular material used in the construction of boats due to its durability, resistance to moisture, and natural beauty. Over time, however, exposure to the elements can cause teak wood to become dull and discolored. But how to restore teak wood on a boat? Fortunately, there are several steps you can take to restore teak wood on a boat and bring back its original shine and luster. This article will discuss the steps involved in restoring teak wood on a boat. Step 1: Inspecting the Teak WoodStep 2: cleaning process, step 3: sanding the teak wood, step 4: teak brightener application and resanding, step 5: teak oil application, step 6: teak sealer application, step 7: teak wood maintenance, additional tips for teak wood maintenance. If you want to know how to take care of teak wood on a boat, you must learn how to inspect the surface for the restoration process. Before starting the restoration process, inspecting the teak wood to determine its condition is essential. Check for cracks, splits, and discoloration on the surface of the wood. If the damage is extensive, you may need to replace the damaged areas with new teak wood. If you still need to, you can proceed with the restoration process. The next step in restoring teak wood on the boat is to clean it thoroughly. You can use a soft-bristled brush and a teak cleaner to remove dirt, grime, and stains from the surface of the wood. Make sure to clean in the direction of the wood grain to avoid damaging the surface. You also need to be sure to get into all the crevices and grooves in the wood. Rinse the teak wood with clean water and let it dry completely. After cleaning the teak wood, the next step is to sand the surface. The purpose of this step is to remove the remaining stains and smooth out the surface. Use fine-grit sandpaper (at least 220-grit) and sand in the direction of the grain. Sand the wood with grain but make sure not to sand too aggressively, as doing this action can damage the wood’s surface. Sanding will also help to remove any raised grain or rough spots on the surface of the wood.  Teak brighteners are designed to restore the natural color of teak wood and remove any stains or discoloration. Apply the teak brightener to the wood with a brush or sponge, covering the entire surface evenly. Allow the teak brightener to sit on the wood for 10 to 15 minutes, and then rinse it off with clean water. After the teak brightener has been rinsed off, sand the wood again with fine-grit sandpaper to smooth out any rough spots or raised grain. Doing this action will prepare the wood for the next step. Once the teak wood is cleaned and sanded, the next step is to apply the teak oil to protect and restore the wood. Teak oil is a natural wood preservative that penetrates the wood to protect against water, UV rays, and other environmental factors. Apply the teak oil using a clean cloth, following the manufacturer’s instructions. Make sure to apply the oil evenly, allowing the oil to soak for 15 to 20 minutes before wiping off any excess oil using a clean cloth. After the teak oil has dried, the next step is to apply a teak sealer to protect the wood further. A teak sealer helps seal the wood’s pores and prevent water and dirt from penetrating the surface. Apply the sealer using a clean cloth or brush, following the manufacturer’s instructions. Make sure to apply the sealer evenly and wipe off any excess with a clean cloth. Allow the teak sealer to dry completely (usually 24 to 48 hours) before using the boat. To maintain the teak wood’s appearance and durability, it is essential to repeat the above steps regularly. Depending on the level of exposure to the elements, you may need to clean and restore the teak wood every few months or once a year. Regular maintenance will help to preserve the wood’s natural beauty and extend its lifespan. 
Learning how to restore teak wood on a boat is a crucial step in maintaining the aesthetic and functional value of the boat. It will not only enhance the wood’s appearance but also protect it from damage caused by exposure to the elements. By following the steps outlined above, you can restore and maintain the beauty of the teak wood on your boat. With regular maintenance, the teak wood can last many years and maintain its natural beauty for generations. Leave a Comment Cancel ReplyYour email address will not be published. Required fields are marked * Save my name, email, and website in this browser for the next time I comment.  Ridetheducksofseattle is reader-supported. When you buy through our links, we may earn an affiliate commission. Learn more How to Restore Teak Wood on a Boat? The Most Detailed GuideWritten by Anthony Roberts / Fact checked by Jonathan Larson Teak wood is one of the materials that are trusted when making furniture. So it is no surprise to see that teak wood became popular among homeowners and boaters alike because of its durability and long-lasting performance.  However, you should be taking care of this material. Otherwise, you will see dull teak wood on your boat. And if you are still looking for how to restore teak wood on a boat, you can find the instructions right here. I’ve failed several times before leaving this complete guide. You will get complete details about methods and relevant tips in teak wood restoration with what you need to prepare to ensure a better cleaning result.  Table of Contents The Durability of Teak WoodThings that you need in restoring teak wood, guide on restoring teak wood on boat, making teak cleaner at home, knowing more about teak oil, up for teak restoration.  Teak’s resiliency goes a long way. Just handle it with care and it can serve you for 10 to 15 years. It may even go as long as 20 years. The durability of the teak wood will depend on the following things:
You should know that what can damage teak wood the most is the wrong way of cleaning. It refers to inappropriate sanding and using harsh cleaning products. If you’re not careful, you just shorten the teak’s life. It can’t be avoided that 1mm of teak is deduced yearly whenever you clean or sand it. So take note of this possible erosion. You should also know that the thickness of the teak ranges from 7 to 18 mm. Teak restoration will take a day or two as dictated by things or cleaning materials that you choose. The time that you need will also be according to the teak’s condition. If the teak is badly worn out, you’ll have to repeat the essential process several times. Before you get started, make a list of the things that you need, just like the following:
One or two pairs of cleaning gloves will protect your hands from any harsh chemical added to the solution. Of course, you’re free to handle it with bare hands, but it’s best to prevent allergies or other kinds of harm.
The initial cleaning can be accomplished by a common powdered soap. It refers to the usual laundry soap. The amount of soap that you’ll administer depends on the area that is composed of teak wood. The scrub that you need in cleaning teak wood is not that special as the one you use at home is fine. It’s efficient in removing dirt that got stuck in the floor for a long period as well as mildew. Secure 3 to 4 scrubs until you finish the job. You may need more if you have more teak wood in your boat.
You will find many teak wood cleaners and they are distinct from each other. The majority of them dissolve in water, while others are in liquid form. They’re formulated for teak wood so discoloration is not something you have to worry about. The ingredients that you will likely find in them are oxalic and phosphoric acid. These substances are known for their ability in eliminating accumulated dirt.
If you fail to give the teak wood attention for a long time, it’s best to use the two-part cleaner. However, you don’t need to utilize this if you’re satisfied with the effects of the one-part cleaner. Thus, you have to examine the teak wood to know its condition. This two-part cleaner is tough and can be hard on the teak. But it can excellently wipe out discoloration or mottling. This thing works on leveling the teak after the cleaning process is done. There are two kinds for you to choose from. They are the belt sander and the high-speed sander. You can also utilize 120-grit sandpaper.
You need either a brush or broom when dusting off after polishing the teak. The broom you use at home can do the job, but you can opt for a brush instead.
The last coat on the teak is from teak oil or glossy varnish . You have to be mindful of the color of the teak before purchasing a certain product. Make a smart choice so the teak won’t turn dark. After selecting the appropriate final coat, you have to determine the quantity that can cover the whole teak area in your boat. You need to have enough cans or bottles to not delay the job.
You may need 2 to 3 foam brushes when applying the final coating. This brush ensures the desired result as it allows the teak wood to absorb the oil well.  Step 1: Begin the initial cleaning on the floor made of teak wood. Wet the area first, then directly apply the regular powdered soap or the laundry soap. After that, thoroughly scrub the surface to practice an outstanding way of cleaning. Step 2: Next, you can use the one-part teak cleaner. Follow the manufacturer’s instructions which are written on its label. Or you can find some cleaners in liquid form that can be applied directly. More so, some are powdered and they need to be dissolved in water following the recommended ratio for efficacy. Step 3: If the one-part cleaner could not deal with discolored areas or mottling sections, you have to resort to the two-part teak cleaner. Step 4: The multiple scrubbing will leave the teak uneven. Some grains tend to stick due to the weathering that occurred over time. To level out the marks of thorough cleaning or some mistakes, use the sander to even out the surface. Always remember to sand every after scrubbing. Before doing it, the cleaner should be completely dry. Sanding is always essential for teak wood that is severely worn out. Also, this process is required if the cleaning formula has left residue. However, you won’t be obliged in some situations so it’s fine to let go of this step. Step 5: After sanding and the level surface comes out, another cleaning should be done. It’s the sweeping off the dust and dirt that still adhere on the wood. You have the liberty to use a brush instead of a broom. Step 6: You have to finalize the restoration with teak oil or teak coat since you make a coat that will protect the teak from the elements. However, some cleaners with useful chemicals dry out in a matter of days so you have to be patient. Until then, you have to wait before you apply the last protective coating. For application, it can be done by utilizing a foam brush or varnish applicator. The number of layers depends on the finish that you prefer. Re-apply as needed to achieve what visual concept you want for your boat. The previous coating of teak oil should be dried first before applying another layer. Read instructions first before application. At present, teak coating for long-lasting shine is not yet available. Apply it every month to meet your desire to have a lustrous teak wood in your boat. If you’re conscious about the ingredients in teak cleaners sold in the market, you can make one at home. Mix 75% detergent and 25% chlorine to create a teak cleaner. It’s not bad if you’re picky in choosing the substance, just like when picking chlorine bleach with trisodium phosphate. It’s for gaining extra punch when you’re looking for a strong effect. What you can gain from using teak oil is not just protection but beautification as well. It brings out the teak’s natural beauty and pattern as well as the oil in it. Teak oils are made from various kinds of oil. But most of them are from linseed and tung oil. Linseed is affordable and it gives the teak a darker shade. The one with tung is more expensive, but it has resistance against water. Manufacturers treat teak oils for mildew fighters, UV filters, and other additives that promote protection. Thus, you get numerous benefits from applying it. Teak wood, just like the other parts of your boat, is exposed to marine pollutants. But the good news is that you can still restore it. There may be several processes and necessary things but it’s worth investing in it. With this simplified guide on how to restore teak wood on a boat, things became clear to you. Even so, the information helps you better understand the proper handling of teak wood to not further damage its appearance.  I am passionate about water sports and technical fields, so combining both makes me interested in making contents about boat accessories. With my partner, we went on many trips and sports games together, which led us to think about how we can spread our joys and passions to many people. Free Shipping On All Orders!
 Table Top Epoxy Clear High Performance Epoxy Kits 5:1 Traditional Epoxy Resin Kits
 Wet Edge Topside Paint Premium Marine Topside Primer Spartan Multi-Season Antifouling Paint
 Gleam Marine Spar Varnish  Lust Rapid Recoat Marine Spar Varnish  Halcyon Water-Based Marine Varnish  TotalBuff Rubbing Compound TotalShine Finishing Compound White Knight Fiberglass Stain Remover
 FlexFit Fitted Mesh Back Baseball Cap Men’s Long Sleeve T-Shirt Hoodie Women’s Long Sleeve T-Shirt HoodieFREE SHIPPING with a minimum puchase of $1,200.00 You are $10.00 away from your free shipping! Shipping, taxes, and dicount codes calculated at checkout.   CLEANS AND BRIGHTENS EASY TO APPLY REMOVES DIRT AND STAINS 2-Part Teak Wood Cleaner and Brightening System Couldn't load pickup availability
Undo years of sun damage and stains — in minutesIf you’re partial to the gently weathered, driftwood-like, silvery gray color untreated teak turns, read no further. But if you’re going to oil, seal, or varnish teak to restore and maintain that golden beauty you originally fell in love with, it needs a thorough cleaning first with a teak cleaner that’s safe for use on teak. The same thing goes if you’re tired of looking at tired-looking teak on your boat’s deck or trim. Especially haggard-looking, dark gray or black, pollution-ravaged, fuel-stained, suntan oil-soaked, fish-blood-and-guts-covered teak that’s seen brighter days – literally. Or moldy, mildewed teak that leaves black spots on bathing suits and towels. It can eventually ruin the teak, if left untreated. Keeping teak wood clean prevents mold and mildew, enhances its beauty, and helps it last longer. TotalBoat Teak Cleaner restores it to its former, golden-hued glory. It’s okay to go against the grain, in fact, it’s absolutely necessaryAfter applying part A to wet teak, scrub lightly across the grain to remove dirt. Going against the grain is important because Part A actually opens up the grain, and if you scrub in the direction of the grain you’ll be pushing the dirt in deeper instead of removing it. After rinsing away Part A with fresh water, apply Part B and scrub lightly across the grain again. Use fresh water to wash off Part B and you’ll be looking at cleaner, brighter teak – it’s that easy. Before varnishing or sealing, let the teak dry completely for at least 24-48 hours. Cleaning the teak may raise the grain slightly, but a light sanding with take it back down. Protect hardware and surrounding surfaces before startingHarsh cleaners can dissolve and destroy expensive teak. TotalBoat Teak Cleaner will not harm teak, but it may hurt other surfaces. Before starting, mask fiberglass, gelcoat, or aluminum surfaces that are near the area to be cleaned. Also, mask or remove any aluminum or painted parts attached to the teak. And be sure to protect yourself – especially hands and eyes – by wearing adequate personal protection.
TotalBoat products commonly used with TotalBoat Teak Wood Cleaner
Danish Teak Sealer FREQUENTLY BOUGHT TOGETHER  White Cotton Cleaning & Wiping Rags TECHNICAL DATA
Watch More Videos YOU MAY ALSO LIKE  TotalStrip Paint Remover
FREQUENTLY ASKED QUESTIONS When should Teak Boat & Wood Cleaner be used?Can this cleaner be used on other hardwoods, what other totalboat products can i use with teak cleaner, how should i apply totalboat teak cleaner, should i scrub against the grain, how long do you need to wait to apply sealer, oil, or varnish after using teak cleaner, does teak cleaner remove oil-based stains from teak wood, will this cleaner remove varnish or synthetic finishes like cetol, can teak cleaner be used on teak trim without first removing it from the boat.
Over 40 Years Serving the Inland Northwest.New to furniture restoration? Let us answer some of your questions!  Always striving for excellence through quality craftsmanship and exceptional customer service. We’re proud to be one of the few shops in the area providing full service options for all of your furniture needs. Two generations of women owners serving the Inland Northwest since 1978. We can perform a full spectrum of wood repairs from antique restoration to dog chews. We recreate broken rungs, work with insurance companies for moving, fire and flood damage restoration, or replace caning and rushing.  RefinishingOur refinishing process starts with a flow-over stripping process that’s gentler on the joints than a dip tank. We can custom color match stains and tinted lacquer to almost any request. We finish the piece with durable lacquer that can be anything from flat to high gloss. We’re unique because we offer the full spectrum of refinishing and repair in addition to upholstery. We can make sure your piece is structurally sound and the exposed wood beautifully restored before you invest in new upholstery. As the business is handed from one generation to the next, we sat down to talk about the past 40 years, and how we plan to continue for 40 more. Do I need an appointment to bring in my items?You are welcome to stop by our office anytime during our office hours for an estimate. We are open Monday-Friday, 9am-5pm. We require a 1/2 deposit on all items left at our shop for restoration, repair, or reupholstery. Can you give me an estimate if I email you a picture?Yes, you can send a picture of your item and we can give you a rough ballpark on cost. However, there are many variables that we will not be able to tell from a picture. Those variables may include structural repairs, size, type of finish, etc. When emailing pictures, take one picture of the front, and one picture of the back, and then take pictures of any specific damage. Sending measurements will help, but again we will only be able to give you a ballpark cost. How long will you take to complete my project?Every project completion date varies based on the size of the project and the amount of work we have in the shop. On average our schedule is 3-6 months out. After we see your project in person and provide an estimate we give a due date. We collect 1/2 deposit as part of holding a spot on our schedule. Due dates can be delayed if we don’t receive decisions such as stain color or fabric selection in a timely manner. Would you help me unload/load my furniture during my visit?We are happy to assist in unloading and loading your furniture. However, we assume no liability for the furniture outside of our doors. When you come to pick up your furniture we ask that you bring supplies appropriate for protecting the furniture in transport such as padded blankets and items to secure the furniture. Do you make "house calls"?Yes, we make “house calls”, but we do charge for them. House calls include estimates, pick up, and delivery. All of our “house call” visits are by one of our Doctors, so they will be able to evaluate your restoration project, give you a firm estimate, and even load the furniture in our commercial van to transport it to our shop. At the time of the estimate/pick up the estimation fee plus a 1/2 deposit for the estimated work is required. I want to fix it myself. Can I buy hardware, foam or wood from you?Sorry, we special order these items for every project. We are not set up to resell to the public. Your best resource for your search is Amazon. The one thing we can order for you is fabric. Can you help with an insurance claim?Yes, we will gladly work with an insurance company and with the client to estimate and repair all or part of insurance related damage. We are members of CPPC the Claims Prevention and Procedure Council which assists in referrals and the correct handling of all types of insurance related claims. We can also arrange for second party repairs such as upholstery cleaning, clock mechanism repair, glassware replacement, etc. Can you restore furniture that has been damaged through fire, flood or moving?Yes, we have been doing this type of work for 30+ years. Often favorite family pieces are severely damaged through some type of disaster. Sometimes an entire house full of furniture is moved to our shop. We restore numerous pieces while the damaged home is being repaired. We can do what is needed to repair the damaged areas from minor touch up to complete refinishing to remove and repair the damaged areas. Can you store my piece once it is complete?A storage fee of $10 per item per day will be charged on all items left in our shop over 2 weeks. In the event items are not picked up within 12 weeks of completion or where Customer is not responsive to Furniture Doctors’ communications for a period of 12 weeks or more, Furniture Doctors may dispose of such items at its own discretion. Ferretti Yachts and Riva to attend Moscow Boat Show 2013
Related NewsPopular news this week, popular news this month, latest news.
Written by Zuzana Bednarova To be represented by Premium Yachts, Ferretti Yachts and Riva , two prestigious brands of the Ferretti Group, will be present at the Moscow International Boat Show 2013, displaying motor yacht Ferretti 530 as well as Riva Iseo yacht tender.  Luxury motor yacht Ferretti 530 Luxury yacht Ferretti 530 was very keen to undertake in collaboration once again with AYT – Advanced Yacht Technology, Ferretti Group Engineering Division and Studio Zuccon International Project . The compact dimensions, 16 meters long and almost 5 meters wide, allow the 530 yacht to deliver grand Italian luxury and cruising immersed in such comfort until now unheard of in a yacht of this size. Ferretti 530 yacht boasts three revolutionary innovations: the full beam master cabin with chaise longue and two large open view windows that make it a real suite at sea level bathed in light, tones and the natural essences of teak. Moving the galley from the center to the aft section creates a unique open space that includes the saloon, galley, cocktail bar and the dining area, the cockpit area continues thanks to the tilting window. The roll bar free sky lounge and the spoiler allow the 530 a sporty appearance combined with elegantly formal lines.  Ferretti 530 Yacht - Interior Riva , the iconic Ferretti Group brand, presented a new model at the historical Lake d’Iseo shipyards in July 2011. Featuring elegance and ease of transportation as its distinctive characteristics, Iseo superyacht tender , a 27 foot runabout, is destined to become a must-have for those who love cruising on both lakes and the sea, and, most importantly, design enthusiasts. It is also perfect for anyone wishing to enhance their yacht with an exclusive tender that will never go unnoticed.  Riva Iseo superyacht tender Due to its ease of manoeuvrability and size, Iseo yacht tender is also ideal as a tender for large yachts. Innovative and elegant, it can also guarantee comfort in bad weather conditions. Besides the electrohydraulic bimini top, it was also designed with a waterproof, automobile-style soft top which protects those on board against water and the wind during cruising. Please contact CharterWorld - the luxury yacht charter specialist - for more on superyacht news item "Ferretti Yachts and Riva to attend Moscow Boat Show 2013".
Quick EnquirySuperyacht news:. Email Your Yachting News to: news @ charterworld.com  Ferretti Yachts Ferretti Group announces its presence at Moscow Boat Show 2013 Ferretti Group attending Hong Kong Gold Coast Boat Show 2014 Ferretti Group Days 2013 to be marked by premiere of Ferretti 960 Yacht Ferretti Group to deliver first Ferretti 960 superyacht and Riva 86 Domino yacht to Hong Kong by mid-December Abeking & Rasmussen’s 41-meter superyacht NURJA relaunched after refit Aegean Yachts unveil 26m explorer yacht HEKATE Late summer special offer on board 72m superyacht ARBEMA in the Western Mediterranean The International SeaKeepers Society will host its 2024 annual Founders Event in OctoberOCEA delivers 33m motor yacht ARAOK II to her new owner 39m sailing yacht LINNEA AURORA launched by SES Yachts A luxury charter yacht is the perfect way to encounter New England’s fall foliage display A first look at 55m superyacht PROJECT AGNETHA from Heesen Yachts Charter yachts offering citizen science opportunities around the world 44m superyacht ORION ONE reaches a construction milestone 44m charter yacht JEMS offers 9 days for the price of 7 in August in Italy 37m luxury explorer yacht OCULUS brand new to the charter market on both sides of the AtlanticCORPORATE OFFICE768 Pennsylvania 307 Moscow, PA 18444 (570) 843-4000 (877) 767-6653 Toll Free Our office is open Monday through Friday 8:00AM to 4:30PM. Off-hours work is available upon request. AREAS COVEREDOur service area covers Maine to the Carolinas, including New England, the DC metro area, and the Mid-Atlantic region. |
IMAGES
VIDEO
COMMENTS
1. Wet the teak down; 2. Apply part one (the caustic), spreading and lightly scrubbing with a bristle brush; 3. When the surface is a uniform wet, muddy brown, apply the second part (the acid), spreading with a clean bristle brush; 4. Apply and spread enough of the acid to turn the teak a uniform tan; 5.
Here are the basic steps that I follow to refinish interior teak: 1. If the wood has never been refinished or if the existing finish is in poor condition, remove all of the parts from the sailboat so that you can work on them easier and apply the finish to all the surfaces. BEFORE - dull and dirty. 2.
The natural, unfinished teak on the sailboat above is a beauty. But with brightwork varnished and the deck oiled (above), she sparkles! Here you can see the difference in a teak deck that's been sanded (top) and unsanded (bottom). Teak maintenance is a love-hate affair for most boat owners. We love the warm, golden glow of a freshly cleaned ...
Our sailboat restoration continues as we completely restore the teak wood in our cockpit (and eventually all the wood on deck). We have a friend a few boats ...
Refinishing anything is a tedious, messy undertaking to do well whether it's furniture or a sailboat. But the results are very gratifying when you get to the end. By the way, go over to my interior teak restoration project if that's on your to-do list.
Wet down the teak. Apply "one-part cleaner", dispersing and gently scrubbing with a soft brush. When the surface of the teak is a muddy brown, uniform wet, apply "Two-part cleaner", dispersing with clean stiffed brush. Apply and disperse the acid required to turn teak into a uniform tan.
Clean the sawdust away and put some paper under the nameplate before you start refinishing the teak wood. Next, brush on teak oil with the grain of the wood, making sure to apply it evenly and to the sides and ends of the wood. Step 3. Let the teak oil sit for a few minutes, then wipe it down with a lint-free cloth to remove the excess oil.
See how to restore teak wood on a boat in this video from Boats.net. Buy Star Brite teak oil for your teak wood restoration project here: https://www.boats.n...
Step 2: How to Brighten Teak Wood. Use a soft bristle brush to apply Part B, and scrub lightly across the grain. As you scrub, you'll notice the teak begin to lighten in color. Rinse thoroughly with fresh water to remove all residue from Part B. Remember to scrub while rinsing to help remove the brightener completely.
The critical last step of your restoration should be applying a teak oil and sealer. If you skip this step, your great looking restored teak surface will return to its weathered look. Be sure your teak is completely dry before you apply the oil and sealer. We suggest using BoatLife's Teak Oil & Sealer. Our oil is the most advanced teak oil ...
2. Revitalizing Your Teak's Natural Beauty: Over time, marine teak can become weathered, dull, and lose its characteristic golden hue. Our restoration services involve thorough cleaning, sanding, and refinishing, revealing the natural warmth and rich tones that make teak a timeless choice for boat decking. 3. Preservation for the Long Haul ...
4. Wash Starke part A off teak thoroughly with fresh water. 5. Repeat same process for Starke part B and rinse thoroughly with fresh water. 6. After Starke products have been applied and rinsed. Wash entire area with mild soap and soft brush to ensure all product is removed from teak and surrounding gel coat.
Flooring options for sailboats include marine-grade carpet, vinyl, or teak. Choose a material that is durable, easy to clean, and complements the overall aesthetic of the boat. Rigging and Sails. The rigging and sails are essential components of your sailboat, and their condition will have a significant impact on the boat's performance and ...
Teak wood is an excellent material for boat decks, furniture, and trim. However, to keep it in good condition and enhance its beauty, it needs regular maintenance. ... This simple teak restoration process can be used on an teak wood including teak furniture and teak decking. Step 1 (Part 1). Cleaning Teak Wood with the JustTeak™ Teak Cleaner ...
Before starting the restoration process, inspecting the teak wood to determine its condition is essential. Check for cracks, splits, and discoloration on the surface of the wood. If the damage is extensive, you may need to replace the damaged areas with new teak wood. ... Learning how to restore teak wood on a boat is a crucial step in ...
Guide on Restoring Teak Wood on Boat. Step 1: Begin the initial cleaning on the floor made of teak wood. Wet the area first, then directly apply the regular powdered soap or the laundry soap. After that, thoroughly scrub the surface to practice an outstanding way of cleaning.
This video shows me using StarBrite Cleaner Brighter and Teak Oil on some weathered Mahogany on my Mariner36 Sailboat
Teak Wood Cleaning and Restoration Steps. Step 1. Apply an even layer of teak cleaner all the way around all of the surfaces using a sponge, going with the grain as you lightly scrub it in. Step 2. Let the teak cleaner sit for a few minutes, then rinse it off from the wood with water. NOTE: You don't need to let the cleaner completely dry ...
2-Part Teak Wood Cleaner and Brightening System. 4.9. 29 Reviews Write a Review. 96%. of respondents would recommend this to a friend. SKU: 490689. This two-part teak wood restoration system cleans and brightens, removing stubborn dirt, salt, stains, and mildew to restore teak's natural, golden color. $31.99.
One insane englishman trying to rebuild the 1910 gaff cutter Tally Ho, in WA. (VIDEO) by SampsonBoatCo. Started by SampsonBoatCo, 10-01-2017, 12:12 PM. 1,676 responses. 357,458 views. 3 reactions.
All of our "house call" visits are by one of our Doctors, so they will be able to evaluate your restoration project, give you a firm estimate, and even load the furniture in our commercial van to transport it to our shop. At the time of the estimate/pick up the estimation fee plus a 1/2 deposit for the estimated work is required.
Ferretti Yachts and Riva to attend Moscow Boat Show 2013. March 12, 2013. Written by Zuzana Bednarova. ... tones and the natural essences of teak. Moving the galley from the center to the aft section creates a unique open space that includes the saloon, galley, cocktail bar and the dining area, the cockpit area continues thanks to the tilting ...
Moscow, PA 18444. (570) 843-4000. (877) 767-6653 Toll Free. Our office is open Monday through Friday 8:00AM to 4:30PM. Off-hours work is available upon request.